Posts tagged soup
Vietnamese Beef Balls with Tendon (Bò Viên) Gân

I actually didn’t end up eating Vietnamese beef balls (known as bò viên) until my more recent years, thanks to the influence of my husband. It just wasn’t something that my household grew up eating with our phở, but I soon learned that making these springy and compact beef balls from scratch would elevate my phở broth and my phở experience to a whole ‘nother level. They are packed with flavor and texture, and are quite fun to eat.

Since having my baby and going through 9 months of pregnancy, I hadn’t made my special 24 hour phở since spring of 2021. Well I finally decided to make phở this past weekend. This time around, I decided, on a whim, to make beef balls using slow cooked tendon as an extra ingredient for added texture. Tendon, also known as ‘gân’, is one of my absolute favorite add ons to my beef phở. When going out to eat, not only do I order it in my phở, but I will order an extra bowl of tendon on the side. If done right, it melts in your mouth perfectly. This recipe makes adding tendon purely optional, but highly recommended.

After making my meatballs, I saved the broth used to cook them, and I added it to my pho broth base for a more complex flavor profile. Nothing is ever wasted in this kitchen!

VIETNAMESE BEEF BALLS WITH TENDON ( BÒ VIÊN GÂN )

Degree of difficulty: 3 ( on a scale of 1-5 )

Preparation time 5 minutes, approx 15-20 minutes to form the meatballs, then 15 minutes of processing

Cook Time: About 10 minutes

 YOU’LL NEED

 INGREDIENTS

  • 2 lbs lean high quality ground beef (I prefer grass fed ground beef, but you can also go to your butcher and ask them to ground up some beef chuck or shank for you)

  • 1 bag Alsa brand baking powder

  • 4 TBS fish sauce

  • 1 TSP sugar

  • 1 TSP ground pepper

  • 2 TBS very finely chopped garlic

  • 1 TBS very finely chopped ginger

  • Optional : 1/2 cup of braised/slow cooked tendon, cut into little chunks [I cooked my tendon the day before I made my meatballs. You can use a slow cooker, simmer on low over the course of about 8 hours), or use a pressure cooker. This ingredient is optional, but recommended if you love tendon and want the extra texture.

 DIRECTIONS

1. In a bowl, combine all of your ingredients, mixing well. Cover your mixture and place it in the fridge overnight to help bind the meat together.

2. When you are ready to make your meatballs the next day, remove your mixture from the fridge. Scoop some of your meat mixture into the processor, being cautious to only do a bit at a time so that you are not overworking the bowl. I would recommend filling no more than half of your food processor with meat (less is better). Process on high and stop to scrape the sides of the processing bowl as needed, and continue processing. When your mixture has the consistency of a fine paste, scoop and transfer to a large bowl, then work on processing your next batch. Continue in batches until all of the meat has been finely processed. Transfer all of your processed meat into the large bowl, and place in the freezer for a good half hour.

3. Remove the meat from the freezer, and begin forming little meatballs, using a small spoon to measure your amount each time for consistency. Place them on a parchment lined tray for easy access. Keep in mind that the meatballs will increase in size as the “puff up” as a result of the baking powder being activated in hot water. Do not worry about the meatballs being perfectly round or aesthetically beautiful, because no matter what, cooking them will make them imperfect.

4. Once the water has reached boiling point, begin placing your meatballs into the water. You will notice your meatballs rising to the top of the water after a few minutes. Once they reach the surface, let them cook for an additional 5-6 minutes before taking them out of the water. Place your meatballs in a bowl and allow to cool.

5. Serve with your phở, or in a bowl with some pho broth and fresh Vietnamese herbs.

Tip: Keep the broth water that you used to cook the meatballs and add it to your pho broth base for a more complex broth.

You can also freeze any leftover meatballs for a few months in the freezer. I like to save them for future phở meals, hotpot, or just to eat with extra broth/noodles I have. The possibilities are endless. I like to wrap them up tightly in cling wrap, and then seal them in a freezer bag for extra freshness.

VI HOANGpho, beef, soup, broth, beef balls, bo vien
Tofu, Tomatoes, and Pork Spare Rib Soup
pork tofu canh.jpg

In Vietnamese culture, you have your everyday meals and your special meals. Everyday meals are easy, ‘throw it together’ dishes that are uncomplicated, comforting, and made for weekly rotation. This particular soup (soups are commonly known as a ‘canh’ in Vietnamese), is one of my absolute favorites for the ‘everyday’ category, and something that I’ve been cooking for the longest time. It’s so ridiculously easy (like most Vietnamese soup/canhs are), and though usually eaten with rice, can also be eaten alone. The only thing different from the way I make mine (as opposed to my parents) is that I purchase the pre-cut pork spare ribs at my local H-mart, so that I don’t have to deal with cleaving my own meat, which I find time consuming, and messy (yes, this is a shortcut!). If you don’t like to deal with bones, I recommend purchasing a pound of pork shoulder, and cutting the meat into cubes. Avoid pork loin, as it can be dry and less juicy in this soup form. I also typically brown the pork spare ribs in a separate pan before placing it in the pot. It gives the meat color and some added texture, but this step is not necessary, and can actually be skipped if you want to cut down on time. I will say that in the past, I gave everyone a general idea of how to make this soup (blame my parents for never measuring anything, ever), however, this time around, I made sure to write down specific measurements for each ingredient so that you have a consistent result each time you make it. The result: a savory soup, packed full of flavor, with mouthwatering, almost ‘fall off the bone’ pork spare ribs. I hope you enjoy this everyday meal as much as I do.

TOFU, TOMATOES, AND PORK SPARE RIB SOUP / CANH

Degree of difficulty: 1 (on a scale of 1-5)

Preparation time 15 min

Cooking time: 2 hours


YOU’LL NEED

  •   A 5.5 quart pot

  •  A non-stick frying pan

INGREDIENTS

  • 6 tomatoes on the vine, quartered

  • 1 x 16 oz package of organic firm tofu, sliced into roughly ½ thick x 1” wide x 1.5” long pieces

  •  1.5 lbs pre-cut spork spare ribs, rinsed, and patted dry

  •  13 cups of water

  •  1 TBS chicken stock powder

  • 2 tsp salt

  •  2.5 TBS fish sauce

  • ¼ cup thiny sliced scallions

  • ¼ cup roughly chopped cilantro

  • Freshly ground pepper

 DIRECTIONS

**Before you begin, place your pork rib bones in a strainer, and gently scrub all the bones with sea salt. Rinse off all of the salt thoroughly. This removes the ‘porky’ flavor, for a better flavor profile.

  1.  Add a couple of tablespoons of cooking oil to a frying pan on med-high heat. Brown each side of the pork spare ribs (this step can be skipped if you are short on time).

  2.  Add the pork spare ribs to a 5.5 qt stockpot, and add 13 cups of hot water. Bring to a boil.

  3.   After the water has come to a full boil, reduce to medium-low, add 2 teaspoons of salt and 1 TBS of chicken stock powder. Allow the soft simmer to build the broth base for 2 hours. During the simmer time (after about an hour of simmering), gently skim the scud from the surface until the broth is clear of any impurities that have risen to the top, and continue to do so until the surface is free of impurities.

  4.  Once you have finished simmering for two hours, add in your 2.5 TBS of fish sauce. Then add in your sliced tofu chunks and your quartered tomatoes. Bring the heat back up to a gentle boil, and then reduce again to medium-low (a gentle simmer), and cook for an additional 20 minutes.

  5.  After the tofu and tomatoes have been stewing for 20 minutes, turn off the heat. Taste the broth and add additional salt or fish sauce, only if necessary.

  6.  Top generously with sliced scallions, chopped cilantro, and freshly ground pepper. Serve with fluffy jasmine rice, or eat alone as a soup.

Vietnamese Chicken Congee (Cháo Gà)
chao ga web.jpg

In the world of Vietnamese cuisine, chicken congee, also known as cháo gà, is arguably the most comforting dish one can eat. As of lately, we definitely need this level of culinary comfort in our lives (2021 is no joke). I approach my chicken congee the way I approach most of my Vietnamese dishes involving chicken broth. I level up by adding an extra layer of complexity to the broth by charring the veggies in my broth base. Yes it’s not the traditional way to make chicken congee, but when it comes to the kitchen, experimentation is key to becoming a good cook, and I’m all about breaking the rules. Ginger, garlic, and onion are charred on the surface to give an otherwise plain broth a little extra oomph. Normally we do this with phở, but wouldn’t it be special if we did it with congee? Note that you can skip this step if you are short on time, or have little patience. The thing about an amazing chicken congee is that it requires patience and time though. The best dishes do. There is nothing that compares to a homemade broth prepared with thoughtfulness, especially when they are simple dishes. If you have the palate, you appreciate the complexities a lot more. Now the only shortcut I take when making chicken congee is that I don’t boil a whole chicken to make the broth. I prefer dark meat as my topping (juicier, more flavor IMO), so I purchase chicken thighs (bone and skin on). It also makes the broth a lot easier to handle, but that’s not why I do it. Feel free to boil a whole chicken (offal removed), or use white meat only if you prefer. Just make sure you leave the bone and skin on so that the broth gets its bone-rich flavor as it develops. Finally, lets talk about toppings. Chicken congee is nothing, and I mean absolutely nothing without Vietnamese coriander (rau răm), slivered scallions, freshly ground pepper, a squeeze of lime, and you guessed it—fresh fried shallots. So make sure you don’t skip out on all 5 of these. I also like to add a small dash of Maggi seasoning right before eating (even though it really doesn’t need it). So ladies and gents, I present to you my Vietnamese Chicken Congee. Bon appétit!

VIETNAMESE CHICKEN CONGEE (CHÁO GÀ)

Degree of difficulty: 2 (on a scale of 1-5)

Preparation + cooking: 2 hours

  YOU’LL NEED

  • Cheesecloth + string

  • A grill wire rack or rack and pan (if using a handheld torch) for charring

  • A large stockpot

 INGREDIENTS (serves 4-6 people)

  • 4 lbs of chicken thighs, skin bone on (I used two packages of 4 thighs/package)

  • 15 cups of water

  • ¾  cup of sweet rice, washed and strained

  • ¾  cup of short grain rice, washed and strained

note: you can also use brown rice if you are being health conscious--and if you are, I recommend pre-soaking it for a few hours before hand, as brown rice takes longer to cook.

  •  One 4-5” piece of ginger, peeled

  • 2 large yellow onions

  • 1 head of garlic, with the bottom third of it sliced off crosswise

  •  9 black peppercorns

  • 1 TBS chicken stock powder

  • 1 TBS fish sauce

  • 1 TBS salt

  • 3 TSP sugar

  • Lime wedges

  • Vietnamese Coriander (rau răm) 

  • Fresh crispy fried shallots

  • Scallions (the lower 2”), rinsed and sliced into slivers

 DIRECTIONS

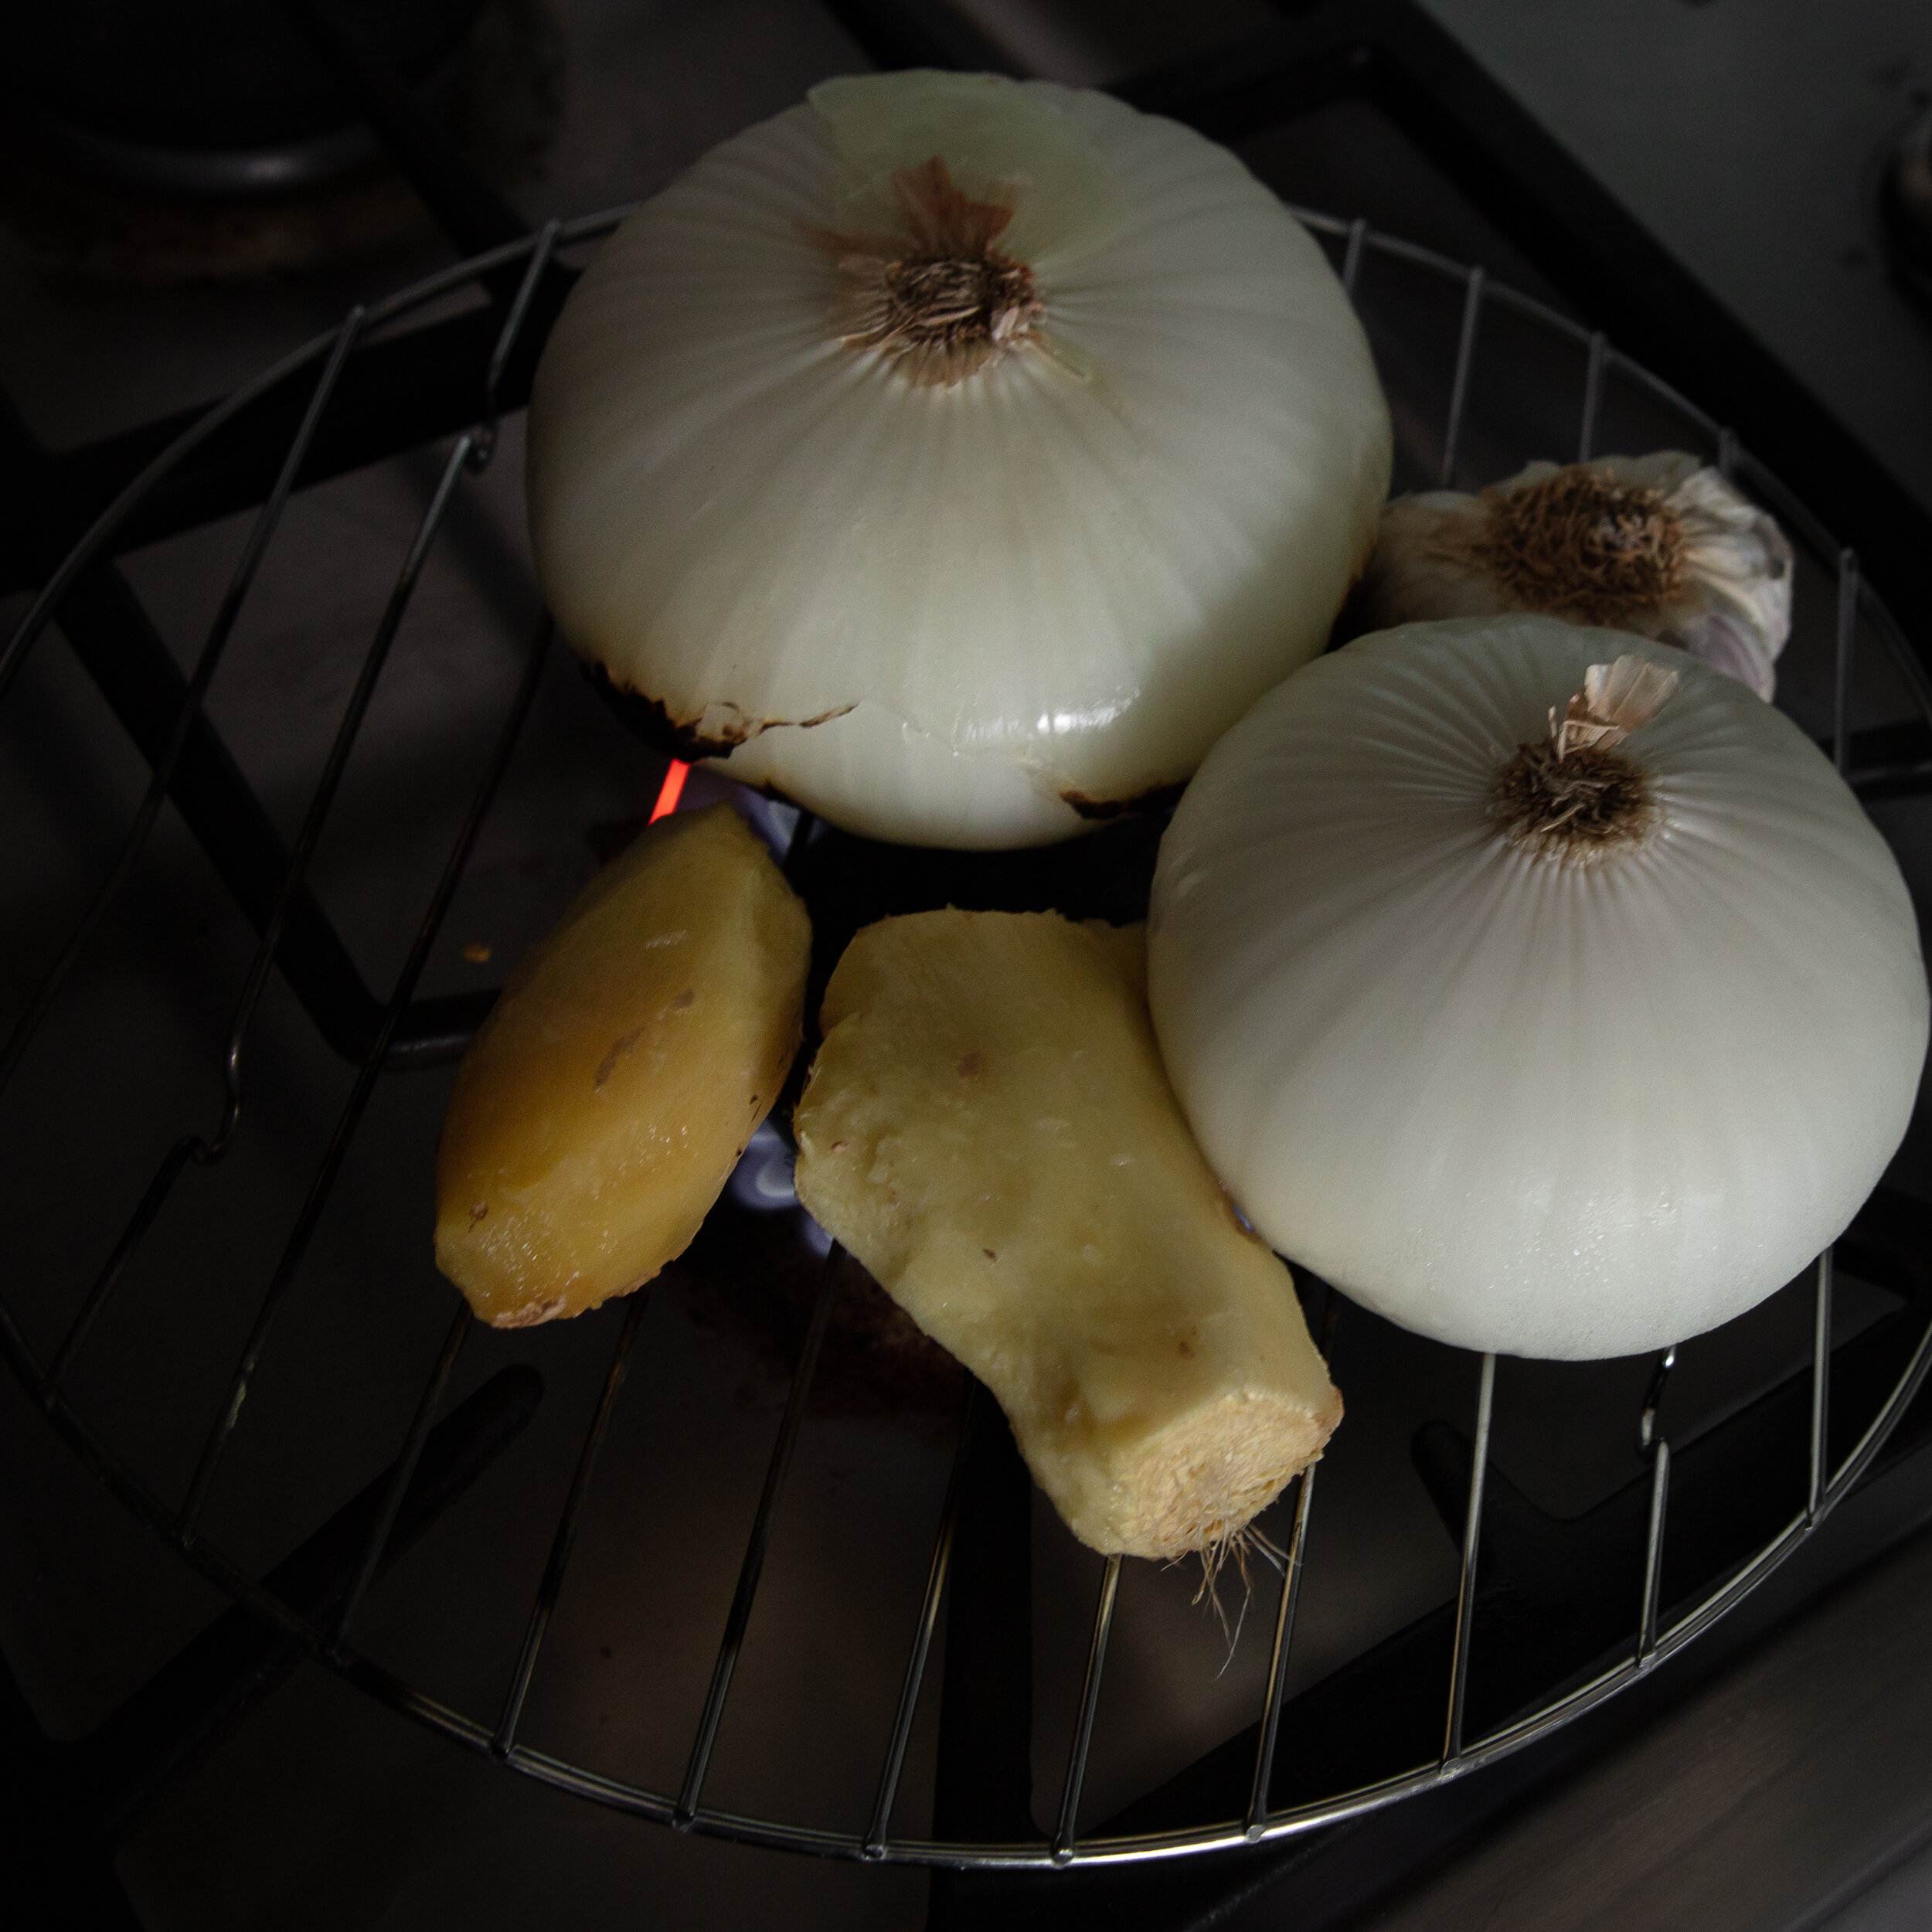
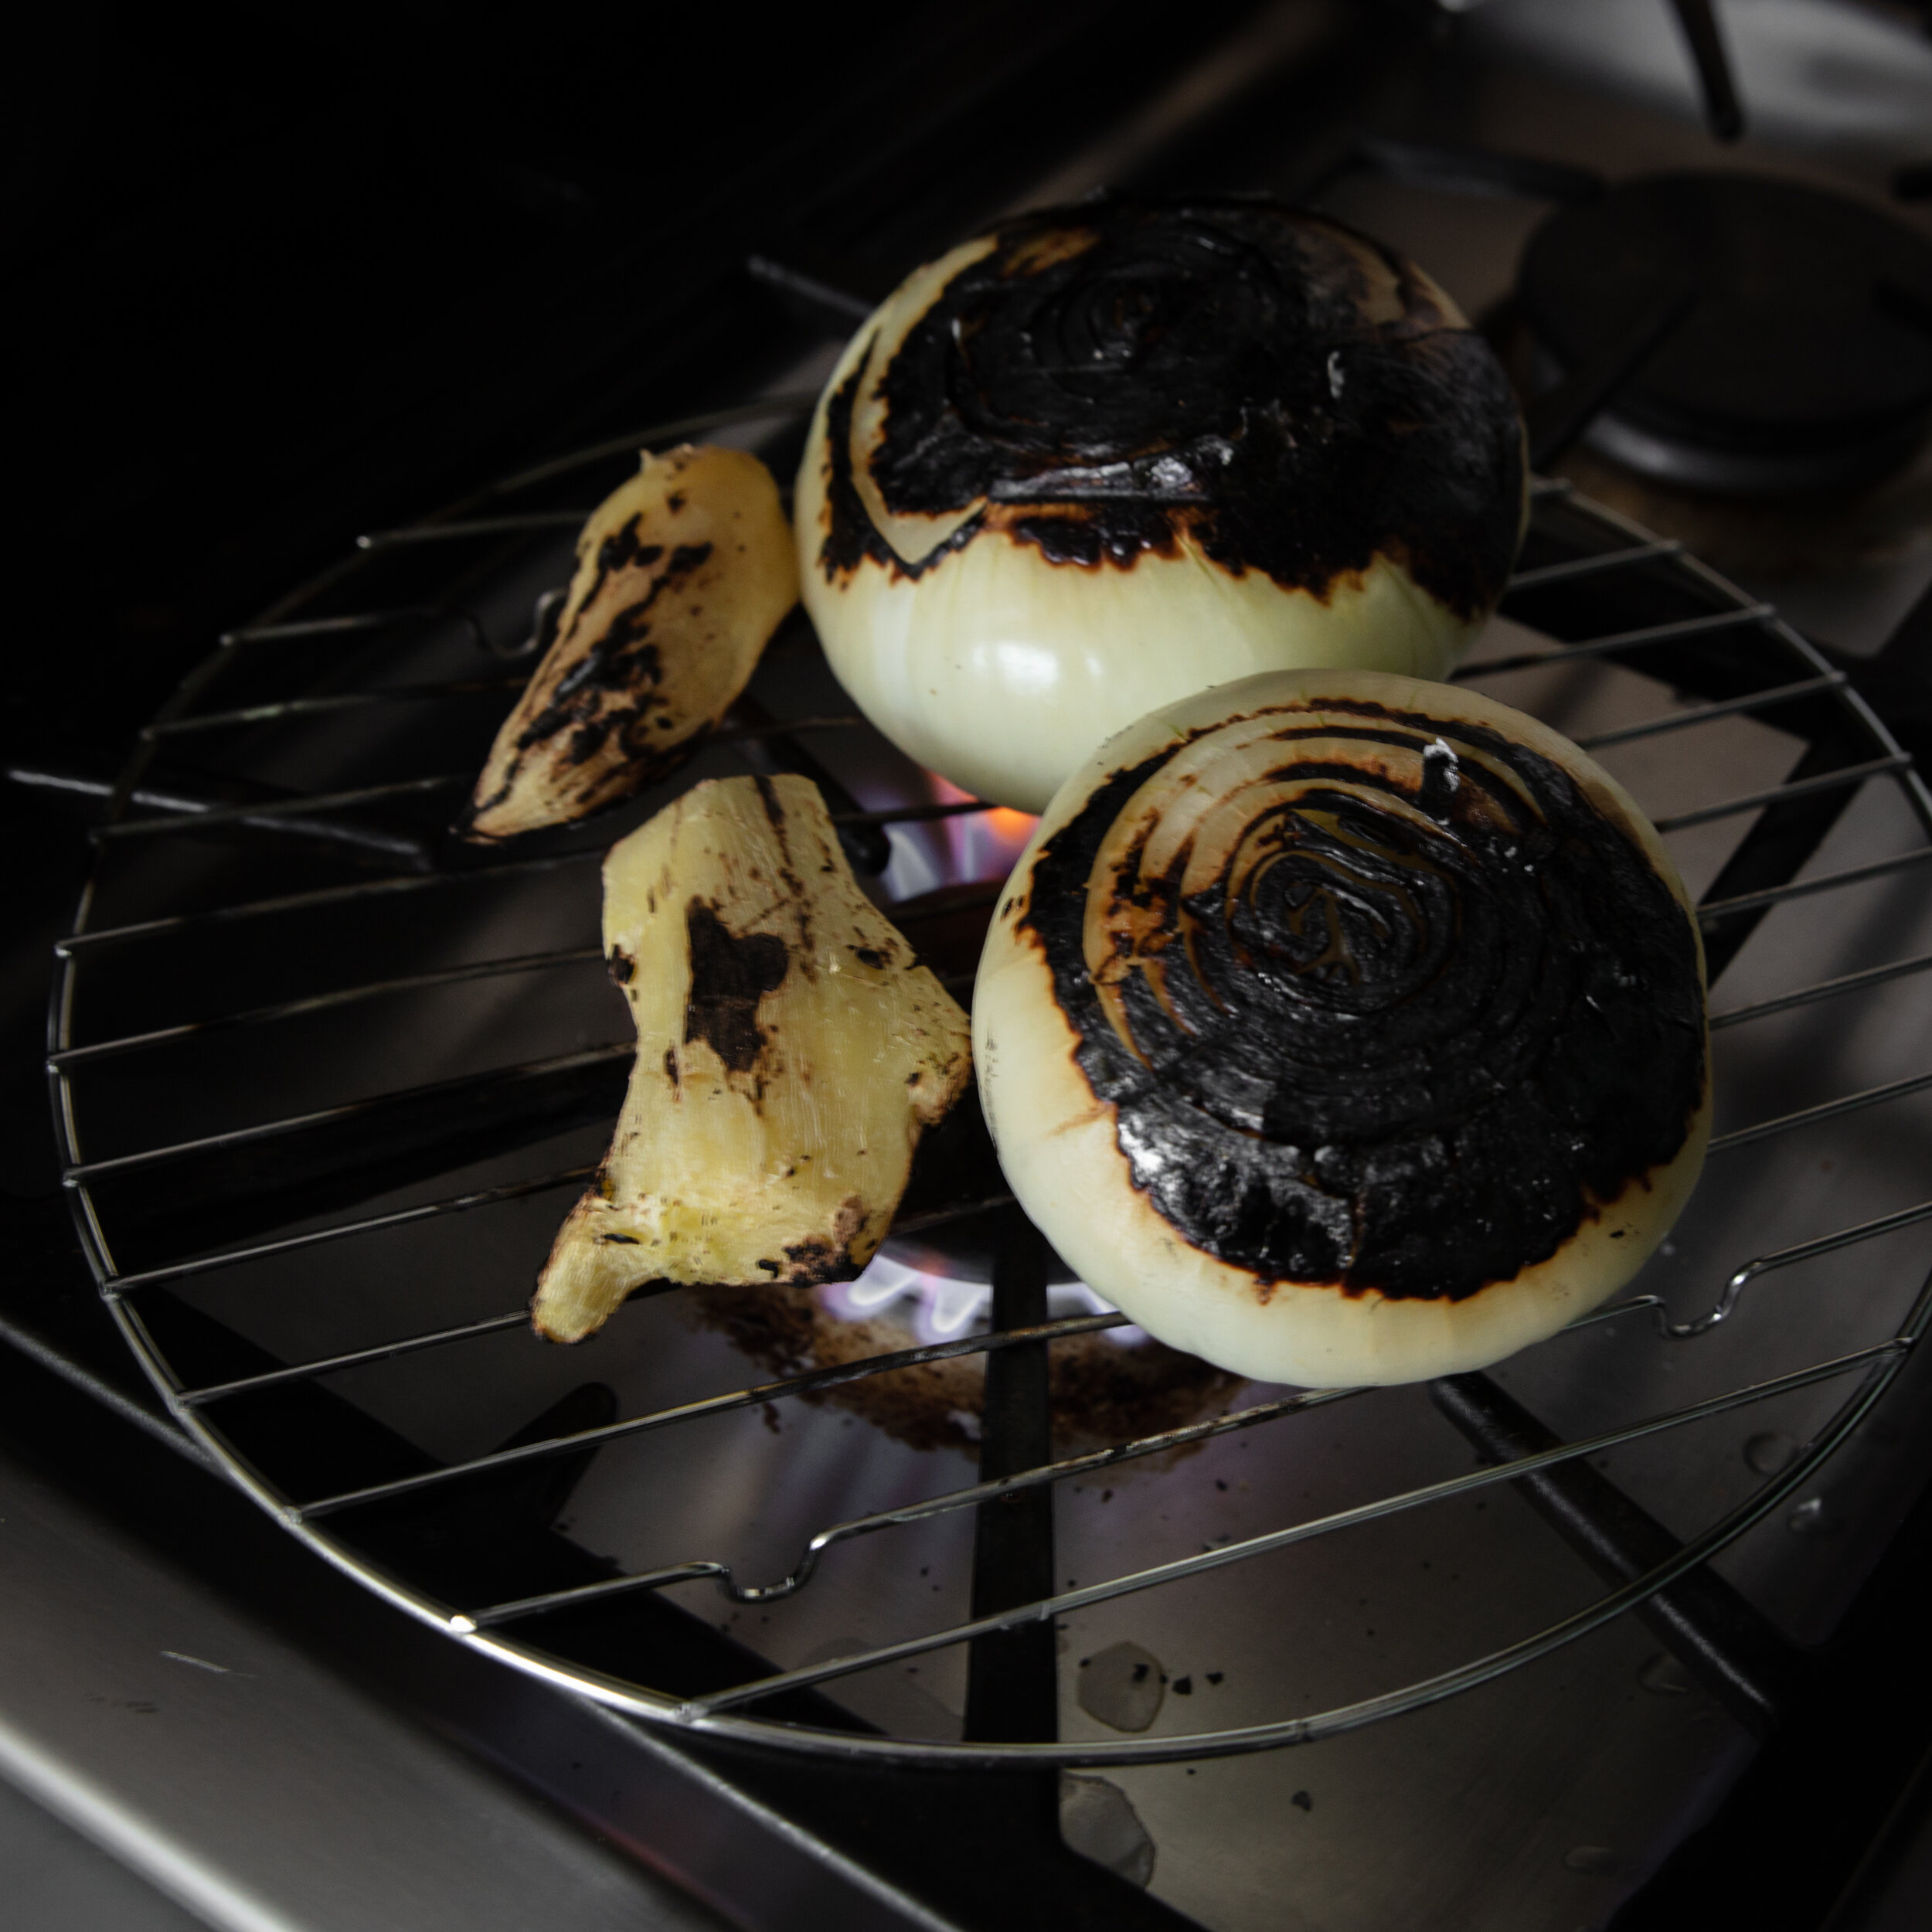
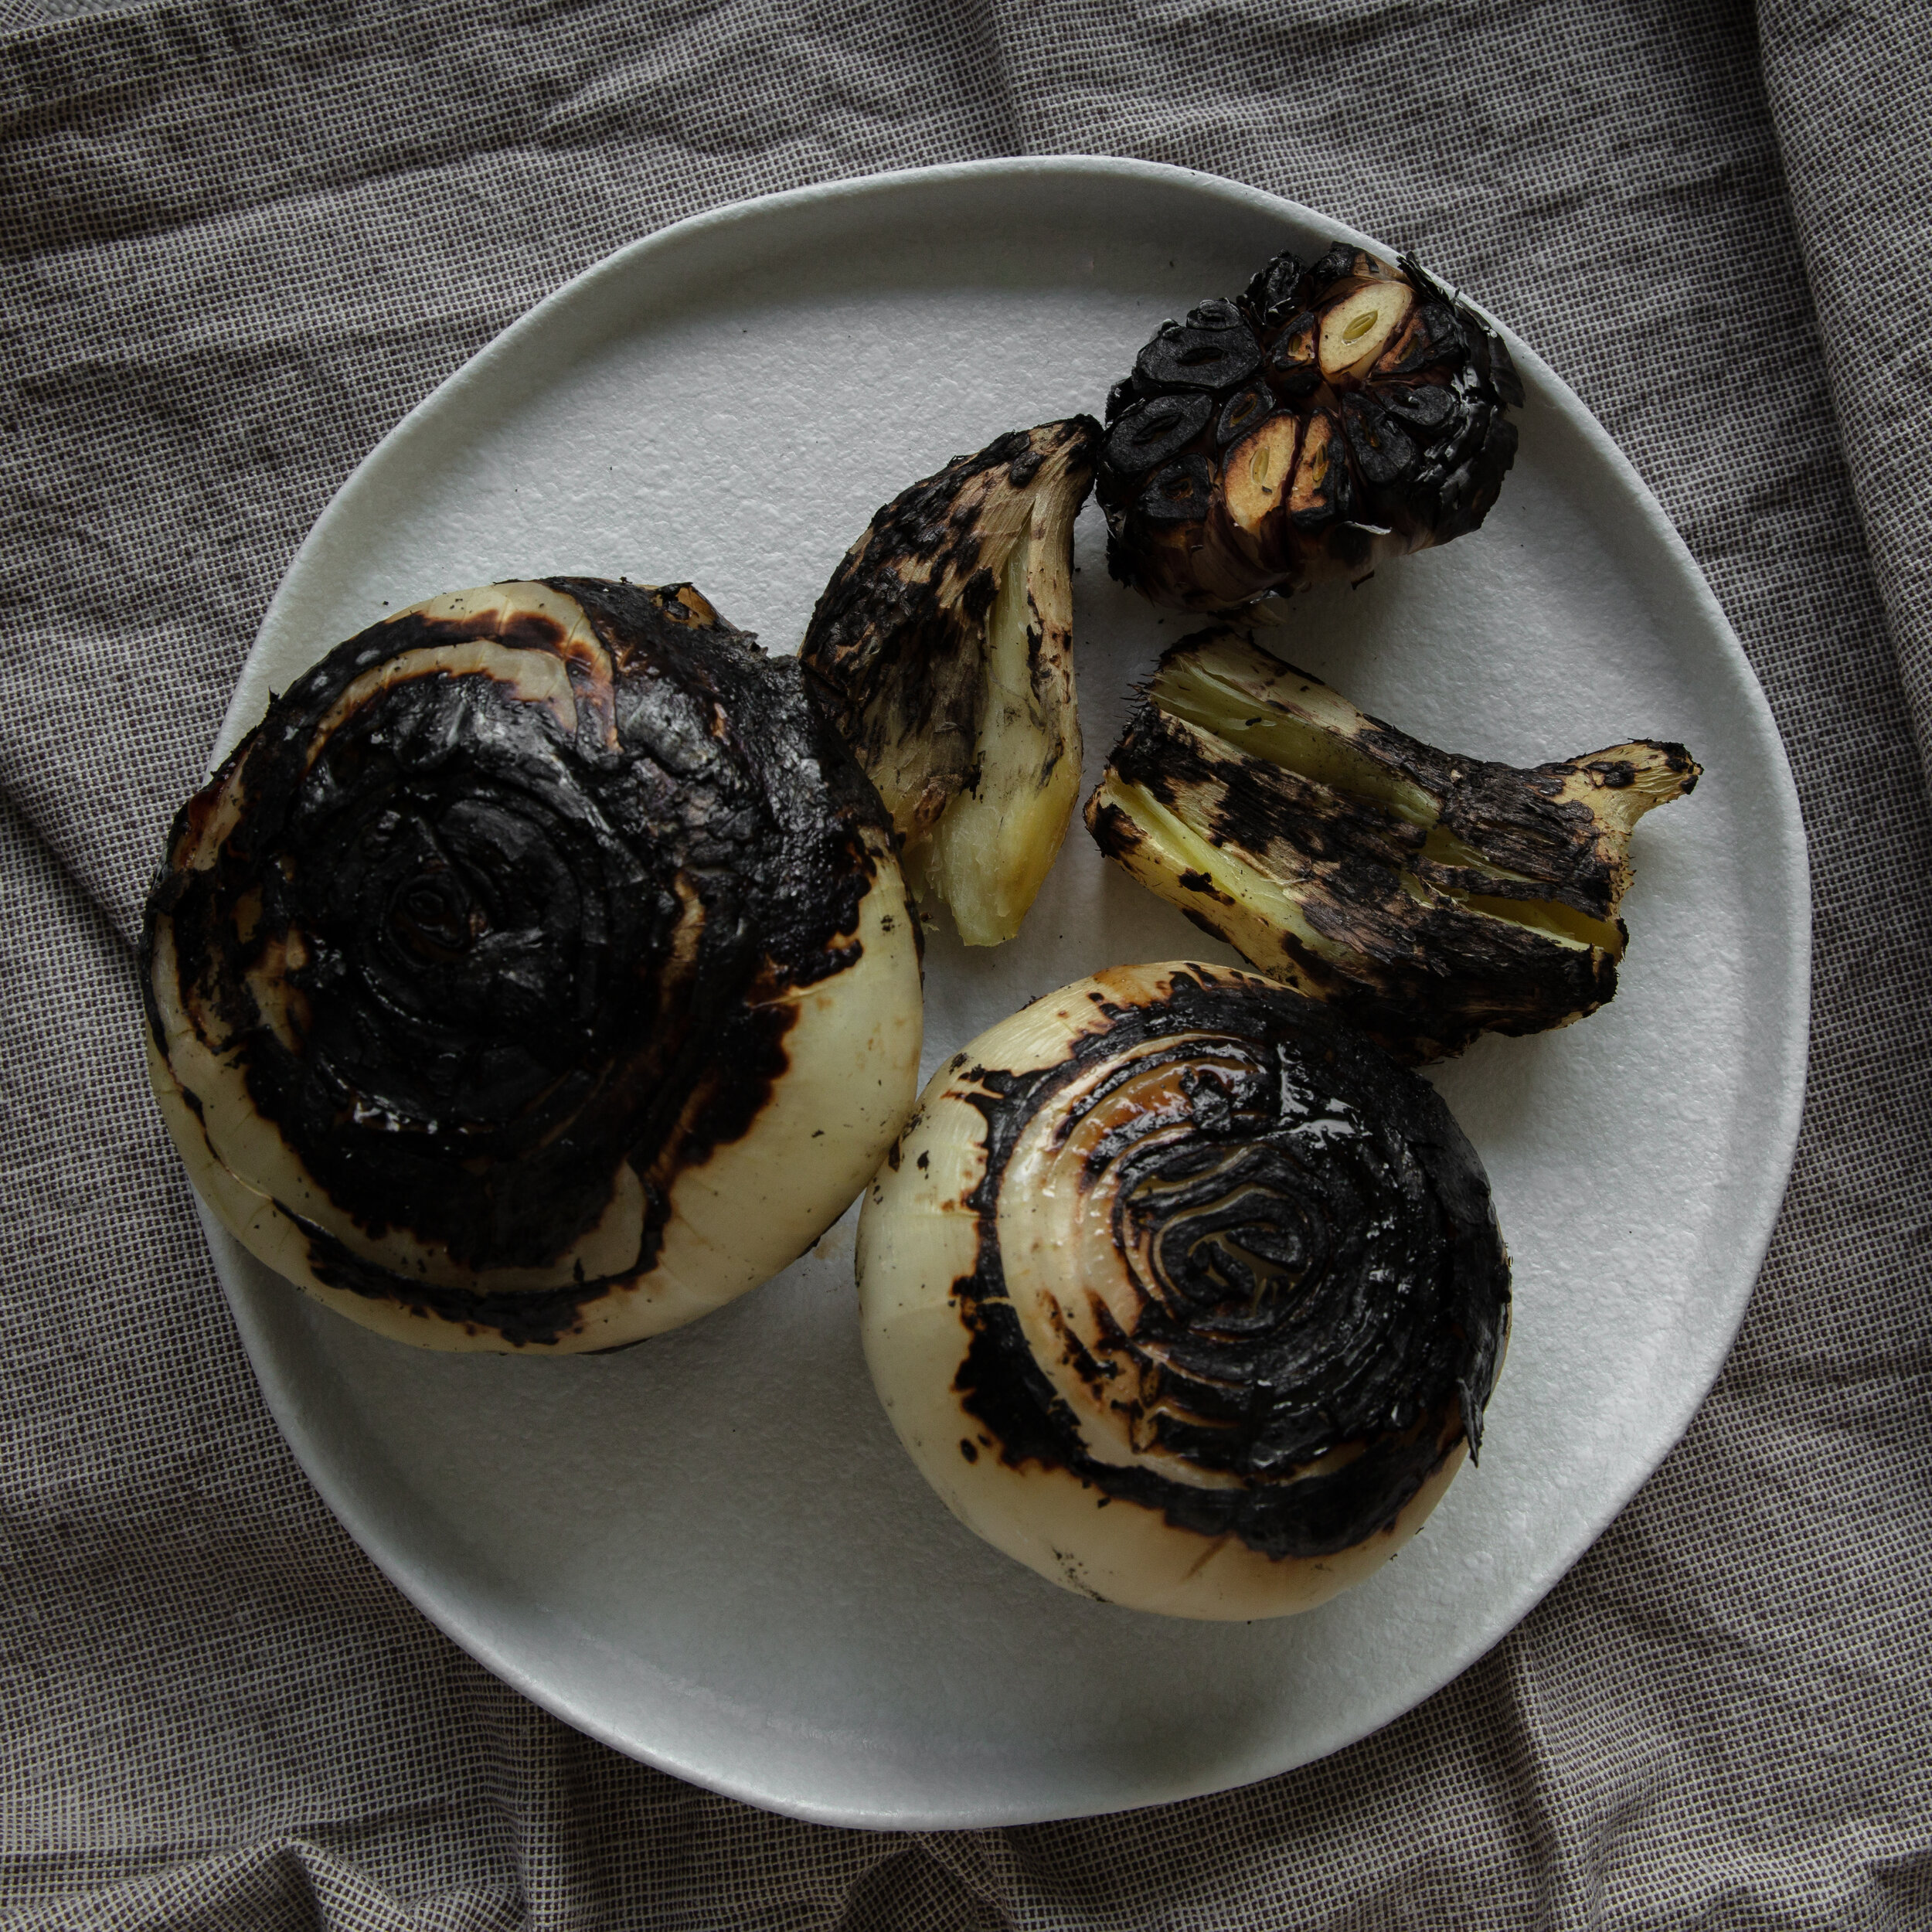
  1.  Char your onions, ginger, and the exposed part of your garlic using your gas stove or a handheld butane torch. If you are using your gas stovetop to char, I recommend using a round grill wire rack (see photo above). I use this rack all the time for charring. If you are using a handheld torch, I recommend torching over a baking rack on top of a sheet pan. You want to char until onions, ginger, and garlic are at least 60% charred, flipping over and rearranging with tongs carefully when some sides have blackened. When you are done, set them aside in a bowl to cool, and then using cheesecloth and string, tie them (make sure to include your peppercorns) into a pouch. This keeps the charred skin from floating around in the broth, and keeps the broth clean and clear, and will save you time from fishing around for ingredients later.

  2.  Begin blanching your chicken in boiling water and a 1 TBS of salt. Remove the chicken from the pot, discard the water, and set aside. 

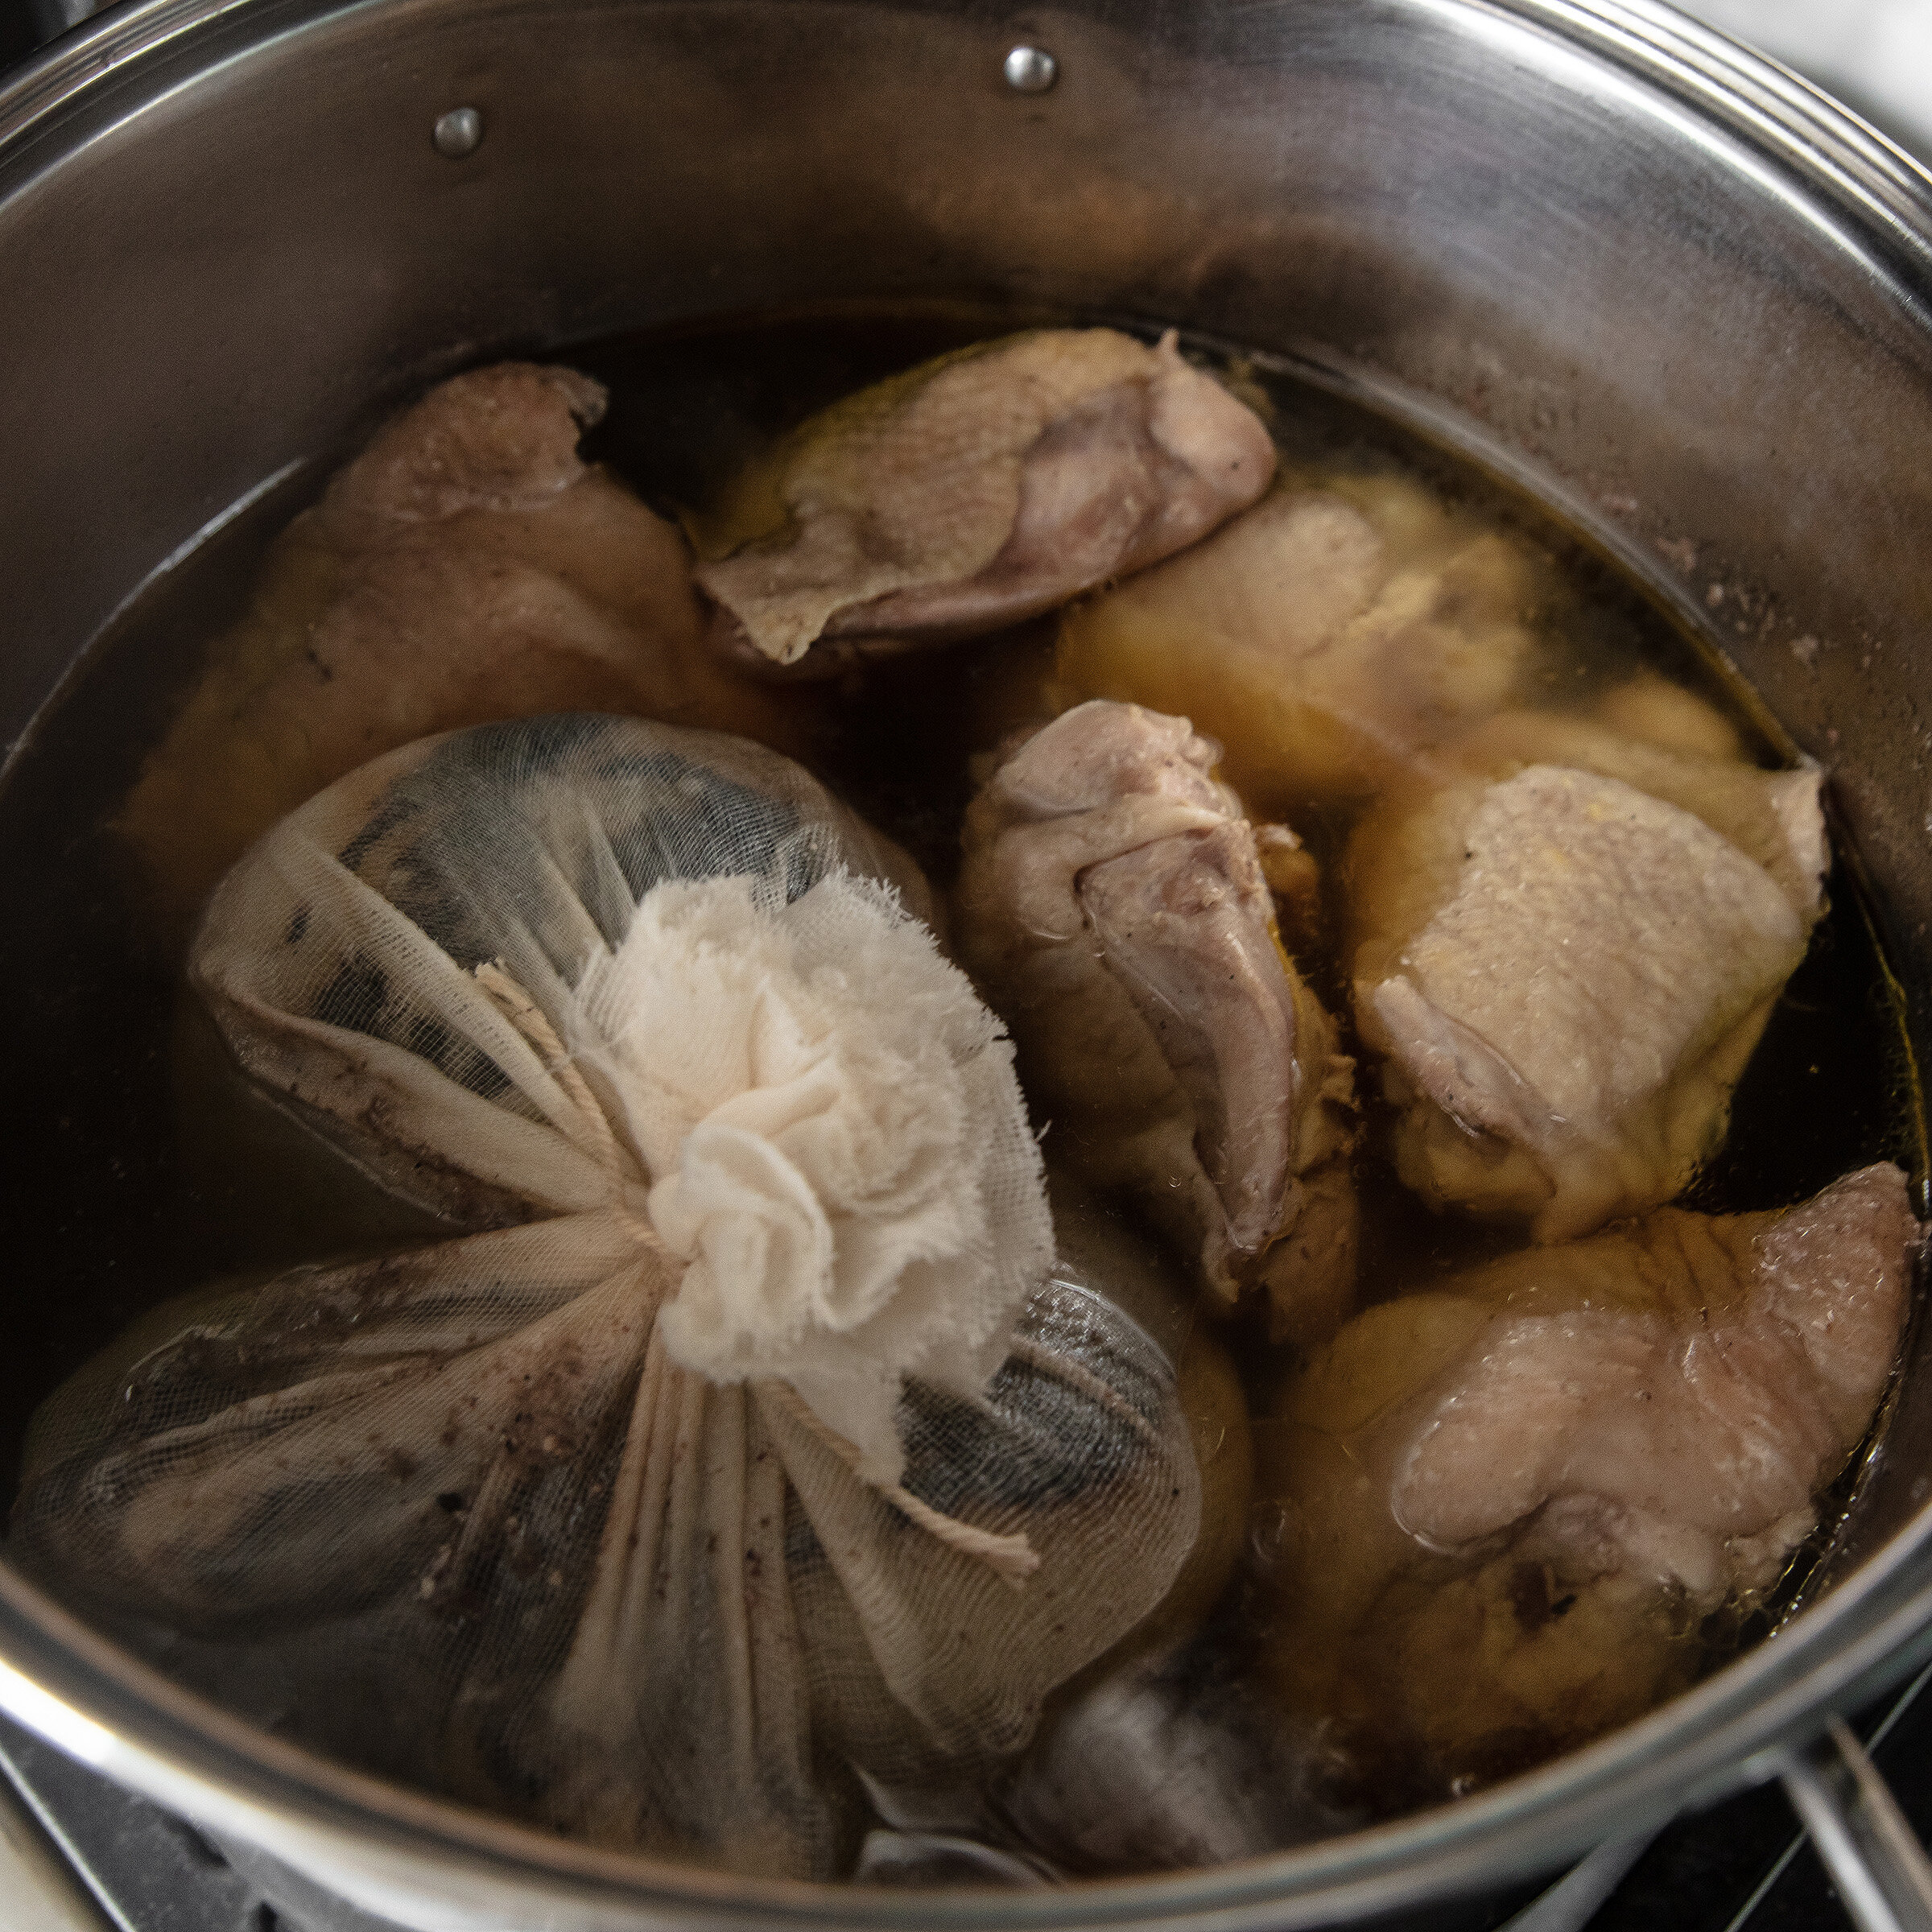
  3.  Using a large stockpot, add 15 cups of hot water, your pouch of onions, ginger, and garlic, and peppercorn, and your chicken thighs, and bring the heat to a full boil. Then reduce the heat to a medium-low, cover, and cook for 1 hour. While the broth is cooking, skim off any crud that rises to the surface, making sure to keep at least 50% of the chicken fat (that rises to the top) in the broth (this gives it more depth and flavor).

  4.  Remove your chicken thighs and allow them to cool for about 20 minutes. Once they are cool, you can shred the chicken with your hands, removing the bones and skin, and non-meaty excess parts. Store the chicken until you’re ready to eat.

  5.  With your heat still on medium-low, stir in your short grain and sweet rice. Cook for about 20 minutes, stirring every once in a while to prevent the rice from sticking to the bottom of the pot and burning. After 20 minutes, remove from heat, allowing the residual heat to continue cooking the rice into a nice porridge like texture.

  6.  Add in 1.5 TBS chicken stock powder, 1 TBS salt, 1 TBS of fish sauce, and 3 TSP sugar. Give it a nice stir to blend all of the seasonings well.

  7.  Ladle the congee in a bowl, top with the shredded chicken, Vietnamese coriander leaves, slivered scallions, a couple grinds of pepper, and last but not least, fried shallots. Squeeze with a small wedge of lime for an extra punch of flavor. Add a dash of Maggi seasoning if desired.