My Perfect Nước Chấm (Sweet and Spicy Anchovy Dipping Sauce) Recipe - Revamped

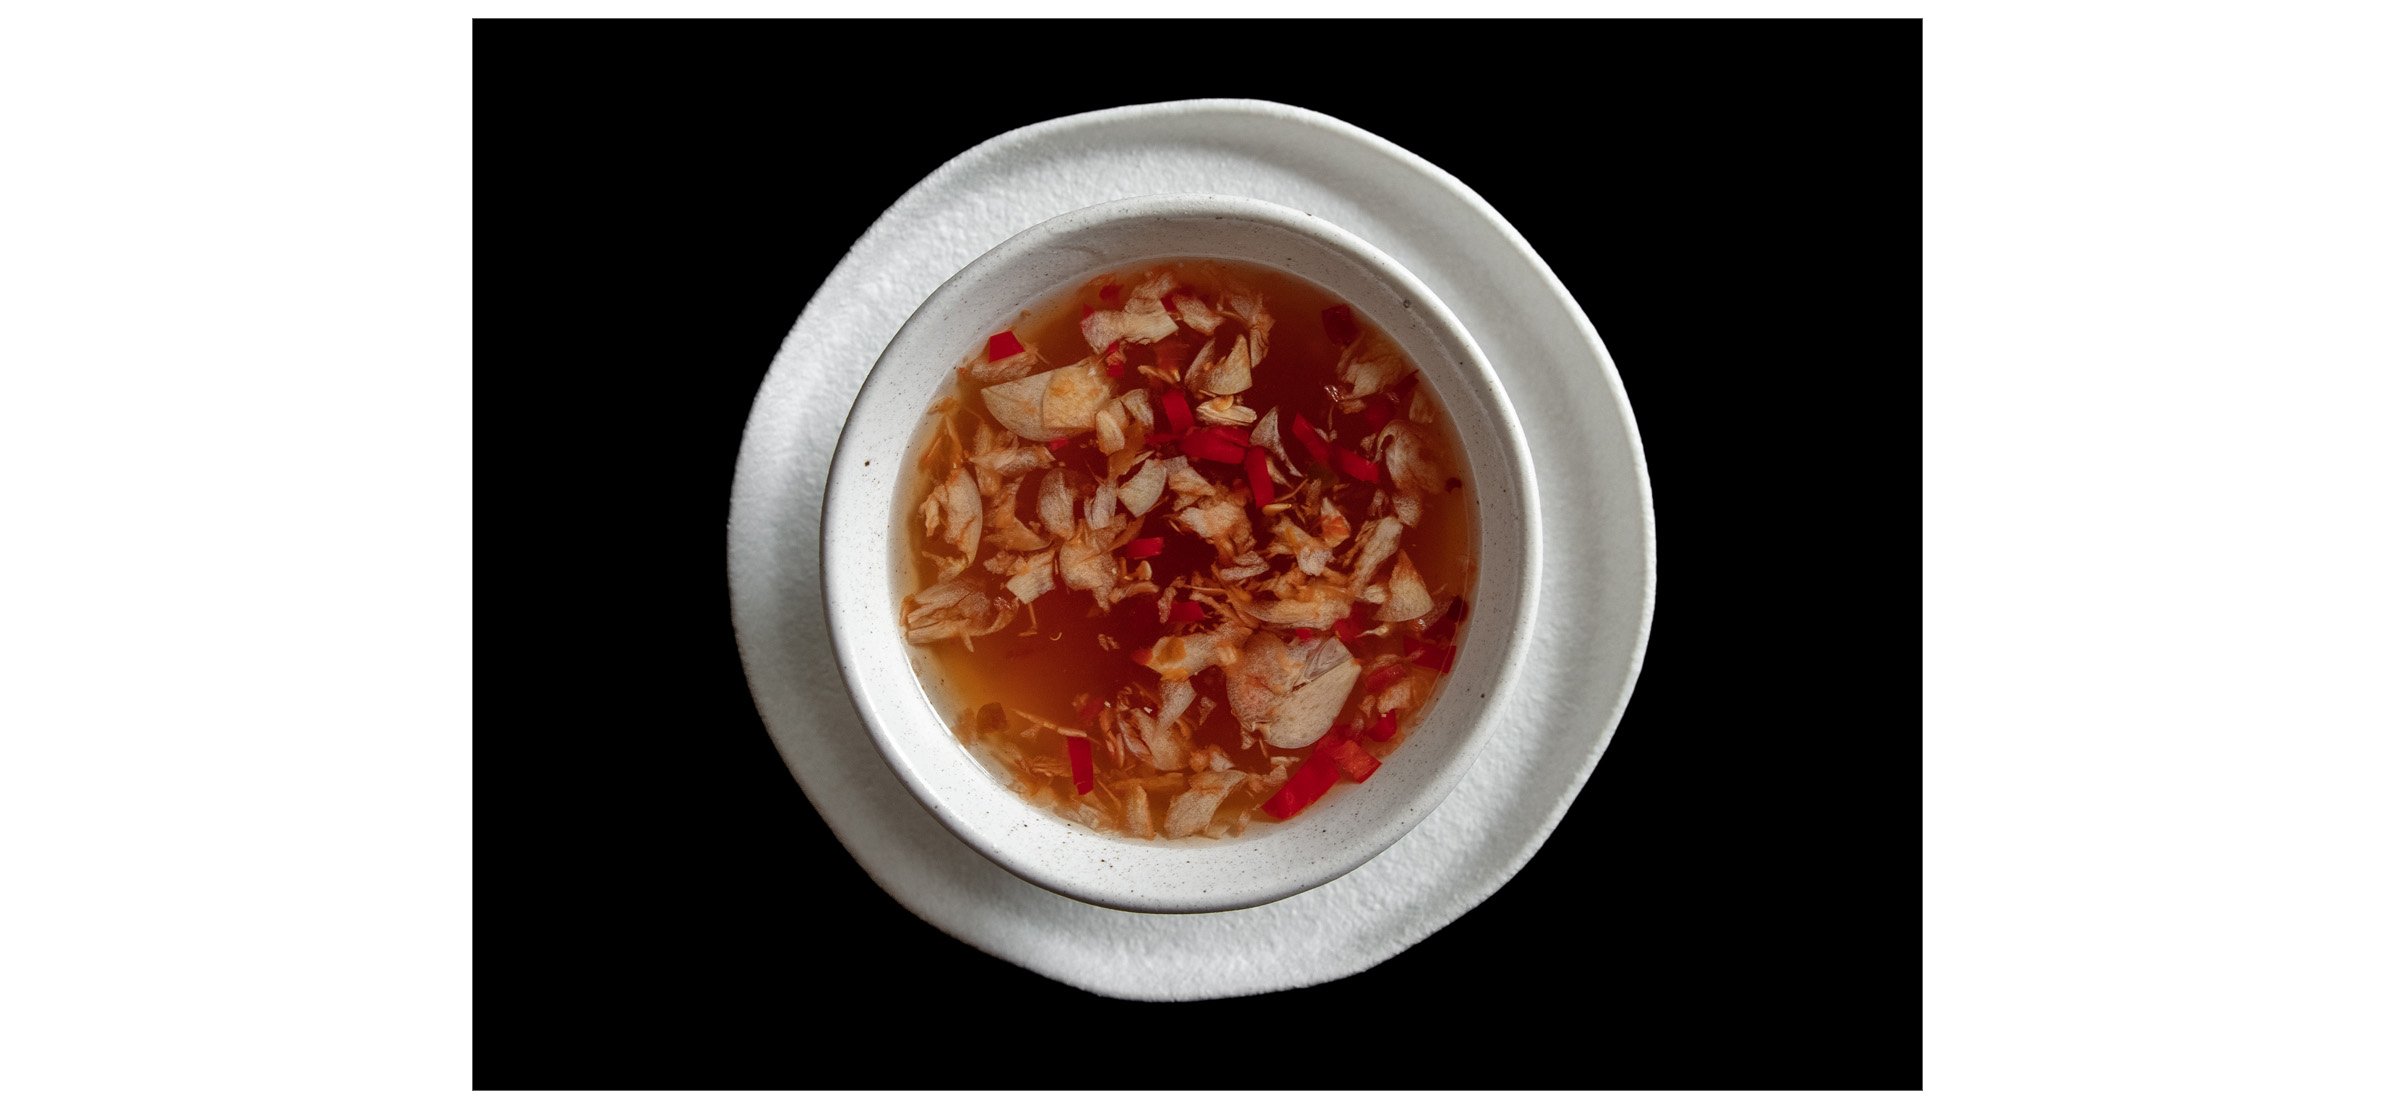
Okay so I’ve been meaning to redo this recipe for awhile now, and I just now found some time to do it. If you’ve seen my previous recipe, it seemed a bit complicated (though to me it wasn’t…until I became a mom). I have always made things complicated because I’m such a purist in the kitchen, and every single little detail and measurement counts to me. My process with this dipping sauce has evolved because I found myself literally just throwing things together quickly for dinner, and I didn’t have time to count those tablespoons and teaspoons the way I did before. This recipe is much easier, and truly a no fuss recipe for nước chấm—the Vietnamese dipping sauce that is eaten with so many of our meals. With this ratio, I don’t even have to taste it to know that it is perfect.

THE PERFECT NO FUSS NƯỚC CHẤM / VIETNAMESE DIPPING FISH SAUCE

YOU’LL NEED

  •  A mortar and pestle

  •  A small whisk or mixing spoon

  • ·A large jar


INGREDIENTS

  •  2 ¼ cups of hot water (the temperature helps dissolve the sugar faster)

  • 1/4 cup of high quality fish sauce (I prefer Three Crabs brand, but use whatever works for you)

  • 1/3 cup of sugar

  • 3 TBS fresh lime juice

  • 2 garlic cloves, thinly sliced

  • 1/2 tsp chili garlic sauce (preferably Huy Fong brand)

  • 2 red thai chilis (seeds removed), thinly sliced


DIRECTIONS

 1.    Mix 2 ¼ of hot water with 1/3 cup of sugar, 1/4 cup of fish sauce in a mixing bowl. Set aside.

2. In a mortar bowl, add 2 garlic cloves (very thinly sliced), 2 Thai chilis (sliced, seeds removed; but if you

like your sauce extra spicy, keep the seeds), and 1/2 teaspoon of chili garlic sauce (see ingredient list

above). Gently pound the mixture until you get a nice blend of the ingredients.

3. Add your garlic and chili mixture to a small bowl filled with 3 TBS of freshly squeezed lime juice. Let the

mixture sit for 10 minutes in the lime juice. Pre-soaking in lime juice will prevent the chilis and garlic from sinking to the bottom.

4. After 10 minutes have passed, add the garlic, chilis, and lime juice into your mixing bowl and stir. Enjoy!

VI HOANG
Vietnamese Beef Balls with Tendon (Bò Viên) Gân

I actually didn’t end up eating Vietnamese beef balls (known as bò viên) until my more recent years, thanks to the influence of my husband. It just wasn’t something that my household grew up eating with our phở, but I soon learned that making these springy and compact beef balls from scratch would elevate my phở broth and my phở experience to a whole ‘nother level. They are packed with flavor and texture, and are quite fun to eat.

Since having my baby and going through 9 months of pregnancy, I hadn’t made my special 24 hour phở since spring of 2021. Well I finally decided to make phở this past weekend. This time around, I decided, on a whim, to make beef balls using slow cooked tendon as an extra ingredient for added texture. Tendon, also known as ‘gân’, is one of my absolute favorite add ons to my beef phở. When going out to eat, not only do I order it in my phở, but I will order an extra bowl of tendon on the side. If done right, it melts in your mouth perfectly. This recipe makes adding tendon purely optional, but highly recommended.

After making my meatballs, I saved the broth used to cook them, and I added it to my pho broth base for a more complex flavor profile. Nothing is ever wasted in this kitchen!

VIETNAMESE BEEF BALLS WITH TENDON ( BÒ VIÊN GÂN )

Degree of difficulty: 3 ( on a scale of 1-5 )

Preparation time 5 minutes, approx 15-20 minutes to form the meatballs, then 15 minutes of processing

Cook Time: About 10 minutes

 YOU’LL NEED

 INGREDIENTS

  • 2 lbs lean high quality ground beef (I prefer grass fed ground beef, but you can also go to your butcher and ask them to ground up some beef chuck or shank for you)

  • 1 bag Alsa brand baking powder

  • 4 TBS fish sauce

  • 1 TSP sugar

  • 1 TSP ground pepper

  • 2 TBS very finely chopped garlic

  • 1 TBS very finely chopped ginger

  • Optional : 1/2 cup of braised/slow cooked tendon, cut into little chunks [I cooked my tendon the day before I made my meatballs. You can use a slow cooker, simmer on low over the course of about 8 hours), or use a pressure cooker. This ingredient is optional, but recommended if you love tendon and want the extra texture.

 DIRECTIONS

1. In a bowl, combine all of your ingredients, mixing well. Cover your mixture and place it in the fridge overnight to help bind the meat together.

2. When you are ready to make your meatballs the next day, remove your mixture from the fridge. Scoop some of your meat mixture into the processor, being cautious to only do a bit at a time so that you are not overworking the bowl. I would recommend filling no more than half of your food processor with meat (less is better). Process on high and stop to scrape the sides of the processing bowl as needed, and continue processing. When your mixture has the consistency of a fine paste, scoop and transfer to a large bowl, then work on processing your next batch. Continue in batches until all of the meat has been finely processed. Transfer all of your processed meat into the large bowl, and place in the freezer for a good half hour.

3. Remove the meat from the freezer, and begin forming little meatballs, using a small spoon to measure your amount each time for consistency. Place them on a parchment lined tray for easy access. Keep in mind that the meatballs will increase in size as the “puff up” as a result of the baking powder being activated in hot water. Do not worry about the meatballs being perfectly round or aesthetically beautiful, because no matter what, cooking them will make them imperfect.

4. Once the water has reached boiling point, begin placing your meatballs into the water. You will notice your meatballs rising to the top of the water after a few minutes. Once they reach the surface, let them cook for an additional 5-6 minutes before taking them out of the water. Place your meatballs in a bowl and allow to cool.

5. Serve with your phở, or in a bowl with some pho broth and fresh Vietnamese herbs.

Tip: Keep the broth water that you used to cook the meatballs and add it to your pho broth base for a more complex broth.

You can also freeze any leftover meatballs for a few months in the freezer. I like to save them for future phở meals, hotpot, or just to eat with extra broth/noodles I have. The possibilities are endless. I like to wrap them up tightly in cling wrap, and then seal them in a freezer bag for extra freshness.

VI HOANGpho, beef, soup, broth, beef balls, bo vien
Pickled Garlic, Ginger, and Chilies

When I traveled to Vietnam in 2015, one thing I learned about the phở in the north (where my grandparents are from) is that the phở there is dangerously good. Everything is so simple, and the focus is on the clear and complex tasting broth. There is no need for hoisin or sriracha, or really all the extras that can drastically alter the flavor of the broth. I mean are we eating hoisin or sriracha phở? You guys, can we not? It really clouds the integrity of the broth IMO. Tasting the phở in the region of Hải Dương changed my entire way of thinking and eating when it came to phở. The simpler, the better. Focus on the broth. Take it slow, and make it a true labor of love. Now I also learned that in parts of the north, adding thinly sliced pickled garlic and chilies for a subtle flavor enhancement was a thing. It’s absolutely delicious. It doesn’t alter the broth, and it enhances it beautifully. Throw in a couple pickled Thai chilies for a slight kick, and you’ve got yourself an incredible bowl of pho (that is, if you put your all into making the broth). My pickled garlic recipe infuses ginger to make the pickling more fragrant. You can or don’t have to add the ginger into your bowl of pho. You can also eat this pickled concoction with any other dish you’d want to enhance.

PICKLED GARLIC, GINGER, AND CHILIES RECIPE

Degree of difficulty: 1 ( on a scale of 1-5 )

Preparation time 10 min

Cook Time: Less than 10 min

 YOU’LL NEED

  • A small saucepan

  • A heat safe bowl

  • An airtight jar for storage

 INGREDIENTS

  • 15 cloves of garlic, very thinly sliced

  • 10 whole Thai chilies

  • 2” piece of ginger, peeled and very thinly sliced

  • 1 TBS sugar

  • 1 TSP salt

  • 2 CU distilled white vinegar

 DIRECTIONS

1. In a heatproof bowl, add your chilies, ginger, and garlic

2. In a small saucepan, combine vinegar, sugar, and salt. Bring to a boil while stirring to dissolve sugar and salt.

3. Remove from heat and pour the mixture into your bowl of chilies, garlic, and ginger

4. Allow to cool, then transfer to a jar for storage. Your pickled concoction can be stored up to a month.

Savory And Sweet Toasted Sesame Seasoning

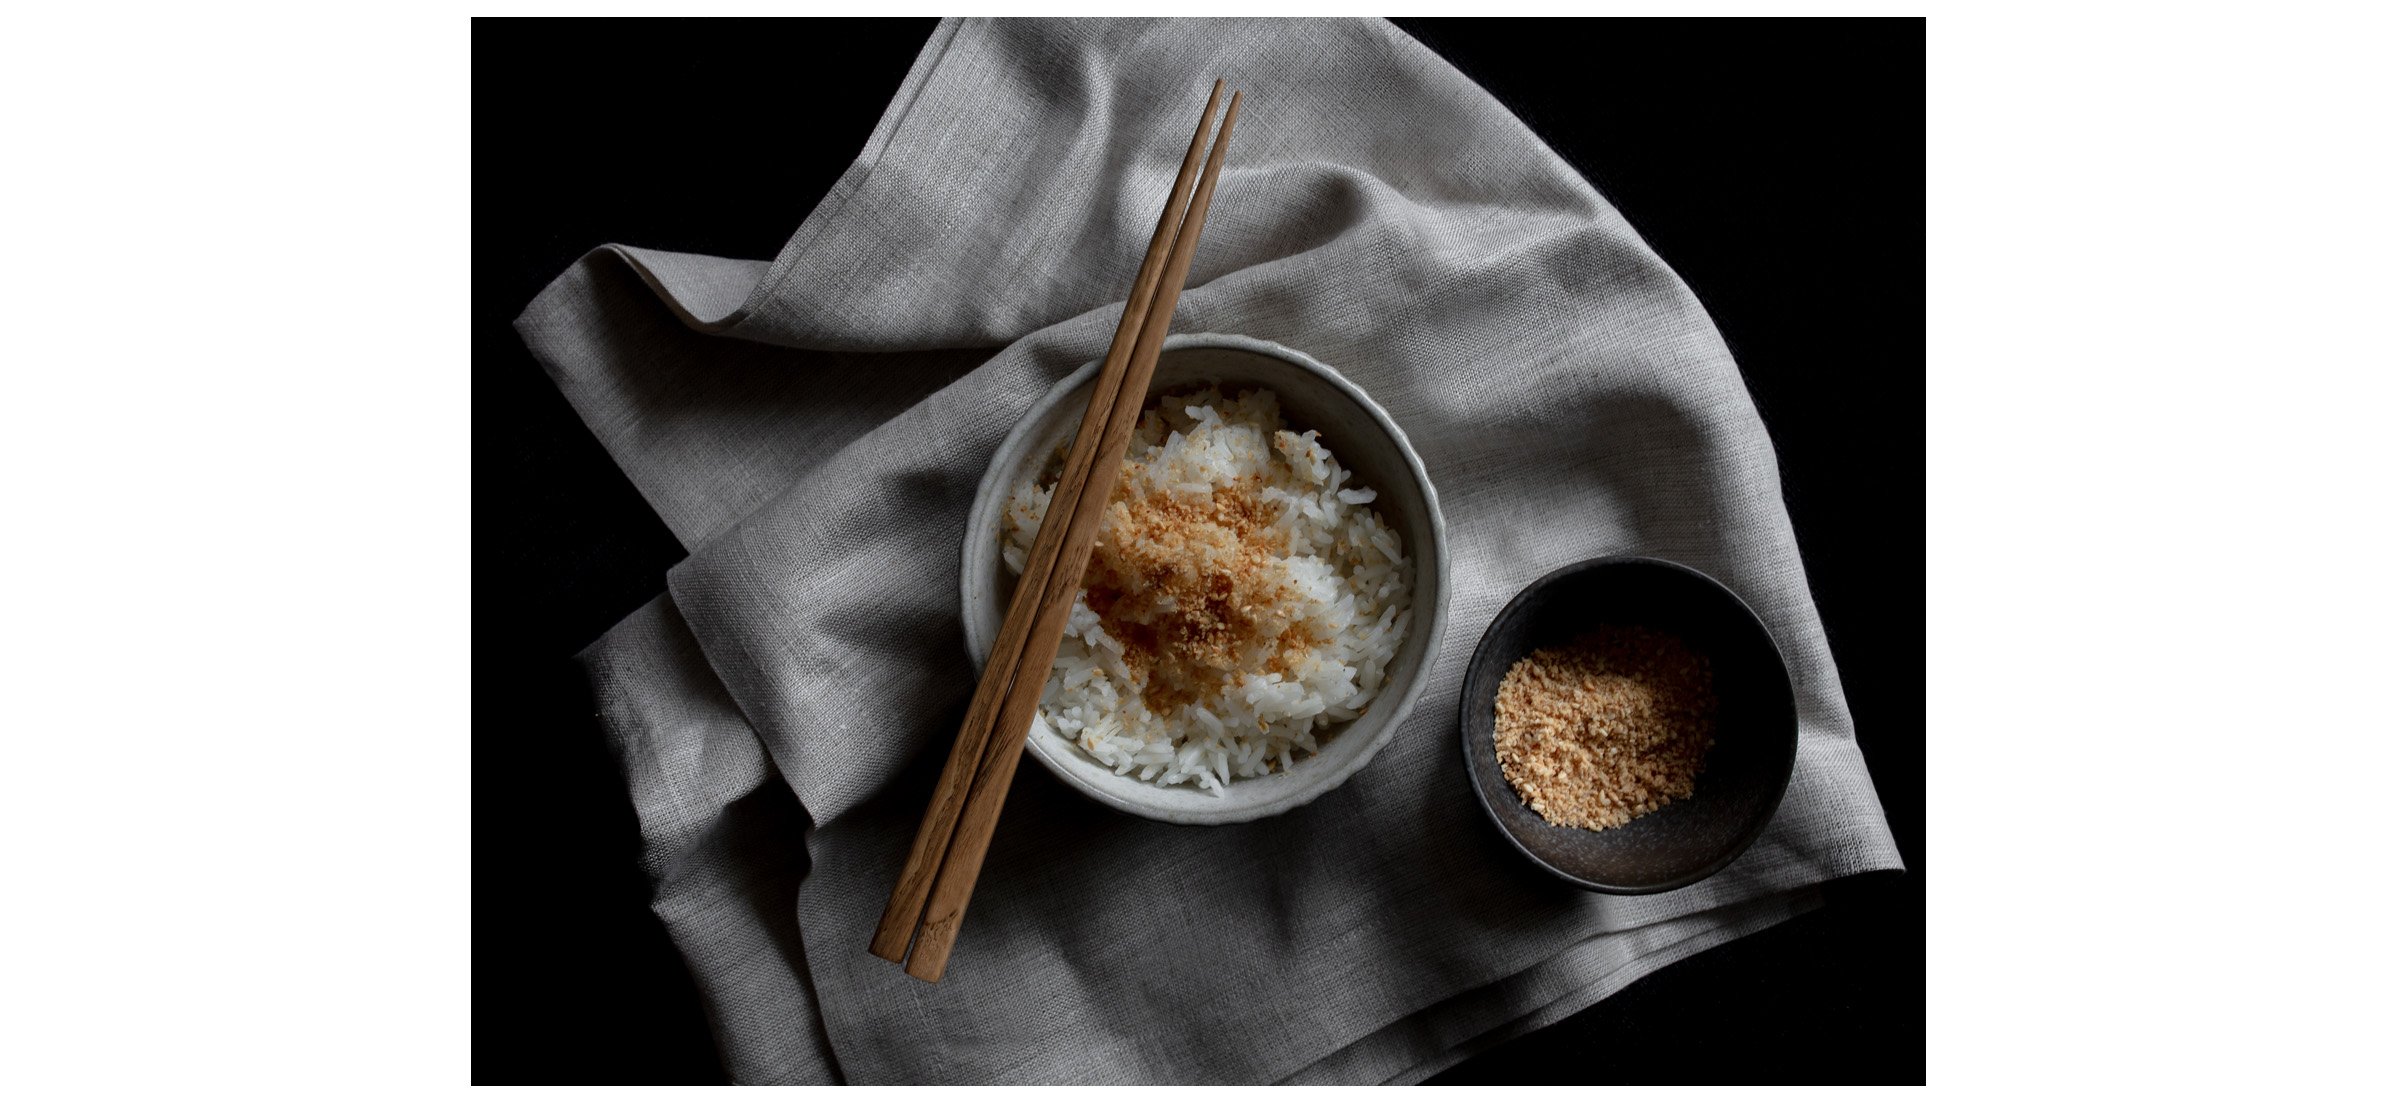
The last time I posted a recipe, I was pregnant and in my third trimester. Baby girl came a few months ago, and my life has turned upside down! Now that I’m a new mom, I have to consider quick meal options while taking care of baby girl. Growing up, we always had homemade sauces and seasonings around for snacking and occasional lazy lunch options. This incredibly easy to make savory and sweet seasoning is made of pan toasted sesame seeds, salt, and sugar. It’s is as easy as it gets folks, and I’m pretty sure it’s kid friendly, as I quite enjoyed it as a child. We sprinkled it on a bowl of fluffy white rice (I prefer short grain rice), but it can also be sprinkled on a variety of dishes of your liking to add a little extra flavor (think noodles, salads, etc). I did a ratio of 2:1 for sugar:salt (which I think is perfect), but it’s totally your call on how you want to adjust it if desired. I would write a little more about this seasoning, and why I like it so much, but my baby girl is calling. Hopefully I will be back with more gourmet recipes, but for now, it’s gonna be quick and easy. Gotta go—bon apetit!

SAVORY AND SWEET TOASTED SESAME SEASONING

Degree of difficulty: 1 ( on a scale of 1-5 )

Preparation time 2 min

Cook Time: 5 minutes

 YOU’LL NEED

  • A small pan

  • A food processor

 INGREDIENTS

  • 1/4 cup of sesame seeds

  • 1 TSP sea salt

  • 2 TSP sugar

 DIRECTIONS

1. Toast the sesame seeds in a small nonstick pan on medium heat until it reaches a medium golden brown. Stir around gently with a wood spoon to avoid burning. This should only take a few minutes.

2. Remove from heat, and transfer the sesame seeds to a food processor. Do a quick 10 second grind, and transfer to a bowl.

3. Stir in salt and sugar. Taste and adjust as needed (some like it sweeter, some like it saltier).

4. Sprinkle on a bed of fluffy rice. Enjoy!

Stuffed Bittermelon Soup w/Glass Noodles (Canh Khổ Qua)

Another delicious dish that my parents made growing up was stuffed bittermelon soup, also known as canh khổ qua. It tastes exactly as it sounds—bitter, hah! But there are actually ways to cut down on the bitterness, and it involves soaking the bittermelon in a lemon brine. You should also keep in mind that the less textured the exterior of your bittermelon is, the less bitter it will be. I just happen to have some small and young organic bittermelon from my mom’s garden that I used (above), which means it is a little bit more on the bitter end, but I don't mind because what I’m really here for is that stuffing (which a touch of bitterness of course!). Naturally when asking my mom for her ‘recipe’, her response is vague as usual: “just put whatever you want in it”. Seriously that was it. So I found myself just tossing some things in a bowl together, and this is what I came up with—my own no-fuss recipe for stuffed bittermelon soup, inspired by my mom. I always find that the simpler the Vietnamese soups are, the better they just taste. Never fancy, but always comforting.

STUFFED BITTERMELON SOUP W/GLASS NOODLES  (CANH KHỔ QUA)

Degree of difficulty: 1 (on a scale of 1-5)

Preparation time: 40-45 minutes

Cook time: Approximately 25 minutes


YOU’LL NEED

  • A 5.5 quart pot

  • A small spoon for scooping out the seeds/filling of the bittermelon


INGREDIENTS (SERVES 4-6 PEOPLE)

  • 5-6 small bittermelon (or 3-4 medium to large bittermelon), cut in half (or thirds if the bittermelon are larger) with seeds and stuffing completely removed

  • 1 large lemon

  • 3 stalks of green scallion, thinly sliced (for garnish/topping)

    FOR THE FILLING

  • 1/2 pound of organic ground pork

  • 1/2 small onion, roughly chopped

  • 1/3 cup of rehydrated dried Earwood mushrooms, roughly chopped (to rehydrate dried Earwood mushrooms, soak them in hot water for about 15 minutes)

  • 1 TSP fine sea salt

  • 1 TSP chicken stock powder

  • 1 TSP freshly ground pepper

    FOR THE BROTH

  • 12 cups of hot water

  • 2 TSP fine sea salt

  • 1 TBS chicken stock powder

  • 2 TBS of fish sauce (and more to taste)

  • 1 small cluster of glass noodles

DIRECTIONS

  1. Cut your bittermelon in half, and scoop out the seeds and filling, making the bittermelon completely hollow inside.

  2. In a large bowl of water, squeeze the juice of 1 large lemon into the bowl, and throw the actual squeezed lemon in the bowl of water as well. Add in your bittermelon, making sure they are completely submerged in the bowl (you can use another small bowl as a ‘weight’ to keep the bittermelon submerged. This technique will help reduce the bitterness of the melon. Soak for 30 minutes, and then drain and pat dry.

  3. In a separate large mixing bowl, add in 1/2 pound of organic ground pork, 1/2 small roughly chopped onion, 1/3 cup of roughly chopped rehydrated dried Earwood mushrooms, 1 TSP of fine sea salt, 1 TSP of chicken stock powder, and TSP of freshly ground pepper. Mix well with your hands until fully blended.

  4. Using a small spoon, scoop the meat mixture into the hollowed bittermelon, packing it in really well. I like to leave a little room at the top (about 1/4”) since the filling will expand and tends to come out of the bittermelon a little bit, but feel free to pack it to the top, flush. Set aside.

  5. Add 12 cups of hot water to a 5.5 quart pot. Bring to a boil, and then reduce the heat to medium-low. Add in your stuffed bittermelon, and 2 TSP of fine sea salt, 1 TBS of chicken stock powder, and 2 TBS of fish sauce. Allow the bittermelon to simmer on medium-low for about 10 minutes before coming back to the pot to gently skim the impurities and scud that have risen to the surface of your broth. Discard the impurities and continue simmering on medium for about 10 more minutes.

  6. Add in your small cluster of glass noodles, and simmer for another 5 minutes on medium.

  7. Once the bittermelon has softened and the glass noodles become clear, you can remove from heat. Taste and add additional fish sauce if necessary. Transfer to a large serving bowl and top with thinly sliced green scallions. Serve with jasmine rice.


VI HOANG
Mom's Garden

If there’s one thing my mom is good at (besides being an excellent cook of course), it’s definitely hands-down, gardening. On my most recent trip to visit her in Houston, I asked her if she could send me home with some Vietnamese herbs—ones I find terribly difficult to find anywhere near me in New York. It turns out that two the main stores I go to (to find Vietnamese herbs) are currently closed. I’m not sure if they’ll ever be back to be honest, and the thought of it is quite devastating to me. Some herbs are absolutely essential for making certain dishes, as the aromatics take the dish to another level. Anyway, my mom took me on a mini-tour of her organic garden and showed me all the herbs and veggies she was currently growing. Her garden is a little Vietnamese heaven. I was most impressed with how each species was thriving in her little yard. Fresh lemongrass, bittermelon, fish mint (diếp cá, which is my favorite for spring rolls of any kind), lemon balm (kinh giới), perilla leaves (lá tía tô), Vietnamese coriander (rau răm, another favorite of mine), a variety of squashes, and so much more. It truly is a Vietnamese cook’s dream, and I hope that one day I can have a garden of that level so that I don’t have to worry about heading to the grocery store to find all of my cooking herbal needs (if there are even any grocery stores around that carry these herbs where I’ll eventually be living—we shall see). Last night my husband and I pulled out the electric griddle to make spring rolls with squid, shrimp, and thinly sliced beef—all cooked in creamy butter, and dipped in my pureed pineapple anchovy sauce. The Vietnamese herbs that my mom packed for me made what would be ordinary, to extraordinary. Even rinsing and preparing these herbs was a nostalgic and ritualistic experience. It felt like home. Of course we’ll be eating this again in the next few days so that the batch doesn’t go to waste. I’ll be posting my version of bitter melon soup next week, since she also packed me that as well. Anyway, I know this is not a recipe post, but it made me so happy that it needed to be shared. In the meantime, happy cooking and happy eating. I’ll be back soon!

VI HOANG
Beef Short rib and Macaroni Soup
beef short rib and macaroni soup main.jpg

Good lord, it’s already mid-September! I can’t believe how this year has flown by, but has also felt like the longest year ever. Autumn will be here in no time, and I cannot wait for cooler weather and the leaves turning colors. Cooler weather also means soups—and lots of them. Today I’ll be sharing a recipe that is based off of a friend’s (@singlegirldinner) recipe for beef short rib and macaroni soup. Using my Vietnamese soup/canh formula, I transformed this already delicious recipe into my own version—essentially a Vietnamese soup. This recipe is pretty easy, but it does require some time for the beef short rib to tenderize in a slow simmer. The good news is that you just have to leave it alone for the most part. This is definitely something the kids will love, and a great soup to have leftovers and enjoy all week. You can also skip out on the macaroni and simply serve it with white or brown rice. Recipe below:

BEEF SHORT RIB AND MACARONI SOUP / CANH

Degree of difficulty: 2 (on a scale of 1-5)

Preparation time: 20 minutes

Cook time: Approximately 3.5 hours (most of it is simmering time, don’t be intimidated!)


YOU’LL NEED

  • A 5.5 quart pot

  • A non-stick frying pan


INGREDIENTS (SERVES 4-6 PEOPLE)

  • 2 pounds of pre-packaged, pre-cut bone-in beef short rib chunks (rinsed and patted dry)

  • 2 medium carrots, peeled and cut into 1” chunks

  • 4 medium red potatoes, skin on and quartered

  • 13 cups of hot water

  • 1 TBS chicken stock powder

  • 2 TSP salt

  • 3 TBS fish sauce

  • 1 large onion, peeled

  • 2 heads of garlic, with the bottoms sliced off (exposing the bulbs)

  • ½ a bunch of parsley, rinsed and tied together using natural string

  • 5 peppercorns

  • Freshly ground pepper (for topping)

  •  Scallions, very thinly sliced (for topping)

  • Roughly chopped cilantro (for topping)

  •  1 box of macaroni pasta, cooked according to directions, and drained

DIRECTIONS

  1.  In a non-stick frying pan on high heat, heat up a few tablespoons of cooking oil of your choice, and brown all sides of your short rib chunks (you may have to do this in batches). I usually will brown about 1 min and 20 seconds per side. Transfer the short ribs to your 5.5 quart pot.

  2. Add 13 cups of hot water to the pot and bring to a boil. Once your water reaches boiling, reduce the heat to a medium-low simmer, and cover. Simmer for one hour.

  3. After an hour has passed, remove all of the impurities/scud from the broth surface completely, using a large spoon. Then add in 2 TSP of salt, 1 TBS chicken stock powder, 1 large peeled onion, and ½ a bunch of parsley. Continue cooking on a medium-low simmer for another 1.5 hours.

  4. After 1.5 hours has passed, add in your 3 TBS of fish sauce, carrot chunks, and simmer on medium for 15 minutes. After 15 minutes has passed, add in your quartered potatoes, and continue simmering on medium for an additional 20 minutes. This process of layering will prevent your veggies from turning into mush (carrots take longer to cook, which means you throw them in first, then potatoes last). Meanwhile, take this time to cook and drain your macaroni. 

  5. Once the carrots and potatoes have gently softened, turn off the heat. remove your onion, parsley, and fish out your short rib chunks. At this point, they should almost be falling off the bone. Set them aside and allow them to cool. Once they have cooled, shred them into chunks either using your hands (I used gloves), or a fork. Set the beef aside to top your soup when you are ready to serve.

  6. Add some macaroni to a bowl. Ladle your soup (including carrots and potatoes) into the bowl, and then top with the desired amount of beef short rib. Top with freshly ground pepper, thinly sliced scallion, and a handful of chopped cilantro. 

VI HOANG
Complementary Dishes: Caramelized Pork + Steamed Cabbage & Egg Dip (Thịt kho + Bắp Cải Luộc)
caramelized pork and steamed cabbage main.jpg

In Vietnamese dinner culture, there is almost always more than one dish served in a meal during weekly dinner. We believe that variety is the spice of life! Proteins are often served with vegetables or soup. Today I’ll be sharing a classic—caramelized pork belly (thit kho) with a side of steamed cabbage, accompanied by an egg dip (bắp cải luộc). Both recipes are super easy and perfect for those who don’t have the time to make an intricate Vietnamese meal for dinner. I love the simplicity and comforting taste of this meal. It’s nostalgic and flavorful.

Growing up, boiled cabbage with egg dip was in regular rotation in our household. The saltiness from the fish sauce blended with medium boiled eggs and just a little bit of reserved cabbage water made eating cabbage a treat. I made it easier by actually steaming the cabbage. It’s just a more efficient process, and makes for less mess in the kitchen. You have a little bit more control on exactly how the cabbage is cooked (the goal is to avoid undercooking or overcooking). And what can I say about caramelized pork? This sweet and savory dish is a Vietnamese classic, and I hope my directions help you achieve the perfect caramelization each time.

STEAMED CABBAGE & EGG DIP RECIPE (BẮP CẢI LUỘC)

Degree of difficulty: 1 ( on a scale of 1-5 )

Cook & Prep Time: 8 minutes for the eggs, 6.5 minutes for the cabbage, and an additional 10(+/-) minutes for prep

YOU’LL NEED

  • A steamer basket

INGREDIENTS (serves 2-4 people)

  • 1 small head of cabbage (cut into quarters, with leaves peeled, rinsed, and patted dry)

  • 3 large eggs ( boiled to a medium bright yolk center boil; I boiled mine for 8 minutes)

  • 4 TBS of fish sauce

  • 1/4 cup reserved boiled cabbage water

DIRECTIONS FOR THE CABBAGE

  1. Using a steamer basket, place all of your quartered cabbage leaves in the basket until full.

  2. Steam for 6.5 minutes. Remove immediately and transfer to a serving plate.

  3. Remember to save 1/4 of the reserved cabbage water for your egg dip.

DIRECTIONS FOR THE EGG DIP

  1. Boil your eggs medium. NOTE: every stove is different, but I found 8 minutes to be perfect for me personally.

  2. After the time is up, immediately remove the eggs and place in a bowl of cold water with ice. Allow the eggs to cool, and then peel and rinse off any shell residue.

  3. Place the eggs in a small bowl. Using scissors or a butter knife, cut or slice the eggs into large chunks. Then add 4 TBS of fish sauce, and 1/4 cu of your reserved cabbage water.

CARAMELIZED PORK (THỊT KHO)

Degree of difficulty: 1.5 ( on a scale of 1-5 )

Cook & Prep Time: 20-25 minutes

YOU’LL NEED

  • A wok

  • A small cooking pan to caramelize the sugar separately

INGREDIENTS (serves 2-4 people)

  • 1 pound of pork belly (sliced or cut into chunks; I purchased mine pre-cut into chunks to save time)

  • 2 stalks of scallion, minced

  • 1/4 TSP of freshly ground pepper

  • 1/4 TSP of sea salt

  • 1/2 TSP of chicken stock powder

  • 1 TBS cooking oil

  • 3 TBS of minced shallots

  • 4 TBS sugar

  • 3 TBS of fish sauce

  • 1 TBS oyster sauce or annatto oil for coloring

  • Thinly sliced scallion for garnish

DIRECTIONS FOR THE CARAMELIZED PORK BELLY

  1. In a mixing bowl, season your pork belly with 1/4 TSP sea salt, 1/4 TSP freshly ground black pepper, 1/2 TSP of chicken stock powder, and your minced scallion. Mix well, and set aside.

  2. In a large wok or cooking pan, heat up 2 TBS of cooking oil on medium. Add in 3 TBS of minced shallots and stir until softened.

  3. Turn the heat up to high and add in your seasoned pork belly. Stir fry until no longer pink, then reduce the heat to low while you prepare your caramelized sugar on the side.

  4. In a separate small non-stick pan on medium-high heat, add in 4 TBS of sugar and shake the pan until the sugar is in an even layer. Allow the sugar to caramelized into a nice light b-medium brown color, and once the whole layer is caramelized (you may have to increase your heat a little to speed up the process, but watch it so it doesn’t burn), add a dash of fish sauce, and immediately transfer the sugar to the wok/pan with your pork.

  5. Increase your heat to medium-high and stir the caramelized sugar around, coating your meat. Then add in 3 TBS of fish sauce and stir again to blend all of the ingredients.

  6. Now reduce your heat to medium, and allow the sauce to simmer and evaporate (about 15-20 minutes). You should notice the sauce begin to darken over time. Once the brown turns into a perfect caramelization, remove from heat, and add oyster sauce or annatto oil for extra color, then mix. Transfer to a serving bowl/plate, making sure to drizzle the sauce from the pan on top.

  7. Garnish with thinly sliced scallions and lots of freshly cracked black pepper. For a kick, add in a thinly sliced Thai chili on top.

Green Papaya Salad w/Beef Jerky (Gỏi Đu Đủ Khô Bò)
green papaya salad main.jpg

As promised (though somewhat late), here is the recipe for my mom’s green papaya salad w/beef jerky, also known as gỏi đu đủ khô bò. I’m sorry for the lack of posts (and the late posts at that), but if you haven’t seen already on my personal IG, I recently announced that I am expecting! It’s been a really long and exhausting year for me thus far, and the journey to get here has worn me out. My first trimester was a literal nightmare, as I lost my taste for everything good, and had nightly bouts of morning sickness. I couldn’t even think about cooking, which shows in my lack of posting (I originally committed to one recipe a week, and that didn’t last). As I’m in the middle of my second trimester, I’m feeling a lot better, though exhaustion continues to wreak havoc on my body, and cooking isn’t a priority like it has been in the past. I will be posting my favorite recipes, just not as often as I’d like.

I digress. Back to this wonderful recipe that is one of my mom’s signature potluck dishes. I always get excited about posting ‘level 1’ (scale of 1-5 on difficulty) recipes, because I know that some people just don’t have the time or energy to make a difficult recipe. And boy do the Vietnamese know how to make some really laborious ones. This one is just too easy, so of course posting it excites me. All you need is a little prep work and the right tools, and you’ll be putting this on the list to make often in the future. This salad is refreshing, textural, sweet, tangy, and has a little kick.

First, you have to get the right ingredients—this recipe only requires 9 ingredients (and this includes ingredients for the dressing—whew!). In the first photo above, you see a few packets of sweet beef jerky—the brand my mom swears by for this particular salad. What I love about this brand (other than it’s tender and delicious flavor profile), is that it is already pre-cut/shredded, so all you have to do is reach in, grab a few handfuls, and disperse it over the top of your salad to finish. The second ingredient is green papaya. Yes I know that all papayas come with a green outer skin, but these particular papayas (commonly eaten in Southeast Asia) are green on the inside. I am thankful I can find them at my local H-mart, though these two were given to me by my mom, and packed into my suitcase on my last trip to Houston. When picking a green papaya, make sure that its nice and firm, with a bright green outer skin. The third ingredient is fresh mint, which is shredded or cut, and mixed in the salad, as well as added on top for garnish. You can also add Vietnamese coriander (rau răm), and/or Thai basil if you wish for a more herbaceous flavor salad (to make it easy for this recipe, I used only mint as the core herb). The rest of the ingredients you’ll be using for the dipping sauce, which includes thinly sliced garlic, thinly sliced red Thai chili, soy sauce, and vinegar. You’ll need a good peeler, a good mandoline slicer (gotta love my Japanese Benriner mandoline), and ICE. My mom swears by soaking the shredded/julienned green papaya in ice water to make it extra “crunchy” before serving. Just make sure to drain and pat dry (or dry thoroughly using a salad spinner) before placing on your platter to serve. I hope you enjoy this recipe below!

GREEN PAPAYA SALAD RECIPE (GỎI ĐU ĐỦ KHÔ BÒ) 

Degree of difficulty: 1 ( on a scale of 1-5 )

Cook & Prep Time: 30-45 minutes ( depending on your quickness in the kitchen! )

YOU’LL NEED

 ·       A vegetable peeler

·       A mandoline slicer, with a small sized julienne blade

·       Cut resistant gloves


INGREDIENTS ( as a side, serves 6-8 people )

For the salad :

  •  1 large green papaya – roughly 2 pounds

  • 4 oz of pre-shredded sweet jerky (see photo for brand and reference; 1 pkg = 8oz)

  • ½ cup of mint (washed, leaves removed, torn or cut into pieces)

For the dressing :

  • 1/3 cup regular sodium Kikkoman soy sauce

  • 1/3 cup sugar

  • 1/3 cup vinegar

  • 3/4 Cu water

  • 2 garlic cloves, thinly sliced

  • 1-2 red thai chili(s), thinly sliced (I use 1 chili, if you want more kick, add more)

  • 1 TSP garlic chili sauce (Huy Fong Foods brand)

DIRECTIONS FOR THE DRESSING

1.     Combine all the dressing ingredients in a bowl and mix well (I like to add the garlic and Thai chili last, right before serving, so that the ingredients float to the top, and look beautiful for presentation purposes)


DIRECTIONS FOR THE SALAD

  1. Begin by peeling the skin off of your green papaya. Once it is peeled, cut it in half, and using a spoon, gently de-seed the inside of the papaya.

  2. Using a pair of cutting gloves with your mandoline slicer firmly placed over a large bowl, begin shredding your green papaya (your mandoline should have already been prepared by affixing a small julienne blade).

  3. After your papaya has been shredded, add water to your bowl, along with a generous amount of ice, and soak it until it is fully chilled. Then drain, and either pat fully dry, or if you have a nifty salad spinner, spin completely dry.

  4. Toss the shredded papaya with your mint. At this point, if you are using more herbs, add those in as well. TIP: you can be generous with your herbs, but you want the green papaya to be the main star of the show. Place on a large serving platter or in a large serving bowl.

  5. Using your hands, top the salad with your pre-shredded sweet beef jerky. Garnish the top of the salad with desired herbs for presentation purposes.

  6. To serve, set the dressing in a bowl to the side with a ladle. When you’re ready to eat, ladle the dressing generously over the salad. Enjoy!


Cooking Tip Of The Day (#CTOTD)

\When you are slow cooking and building a broth, the best way to keep the broth clear (and not cloudy) is to keep the simmer low and long. I find that this tip is very useful in making noodle soups, especially phở bo (beef pho). I like my beef phở broths to cook somewhere between 12-24 hours, depending on what I’m feeling at the time. How gentle should a low simmer be? You shouldn’t be seeing any bubbles, just a slight murmur of the broth while it is simmering.

VI HOANG
Steamed Rice Paper Filled With Seasoned Ground Pork (Bánh cuốn)
banh cuon main web.jpg

Apologies for the lack of posting lately—it’s been very busy for me here in New York. This recipe is a bit of a complicated and lengthy one, so I wanted to make sure I took my sweet time with it, so that I’d get it just right. Today I’ll be sharing my recipe for steamed rice paper filled with seasoned ground pork—more commonly known as ‘bánh cuốn’ in Vietnamese. It has to be hands down, my favorite dish to eat. I am salivating thinking about it. I have been making this dish for years, cooking the rice sheets using the pan method (which is what my mom does). However, a few years ago I discovered the traditional way to make them in Vietnam—using a steamer pot, a metal ‘O’ ring, and a tightly fitted sheet of fabric. This method actually allows me to make the sheets even thinner, which adds to the magic of the dish. Though I will admit that no matter what, my mom’s version will always be my favorite. The purpose of me trying this more traditional method was for me to challenge myself in the kitchen—and boy oh boy, was it a challenge. I spent hours, sweating and literally crying over the stove trying to achieve the perfectly thin steamed rice sheet. It took several batches and countless tears, but I ended up achieving this feat over time. I feel a little bamboozled though, and here’s why: the steamer pot came with all the necessary pieces, including two sheets of fabric. I stuck with using one fabric, which appeared to be all cotton (at the time I didn’t open the second sheet package, so I didn’t know there was a different fabric). It was incredibly difficult to remove the rice sheet from the cotton fabric, so I had to take my time and learn how to operate in the perfect rhythm. It was not pretty, and I made a complete mess in the kitchen every time. I continued using this cotton sheet for over a year, saving the other sheet for when I absolutely needed to swap it out. Well with this last batch, I finally decided to use the other sheet, and I noticed that the texture of the sheet was a lot smoother, and that it was probably a blend of cotton and polyester. Little did I know that this sheet made it much easier to remove the rice sheet from the fabric, saving me time and energy (as well as sweat and tears). This whole time, the secret was that the fabric absolutely had to be a cotton-poly blend. So now that I’ve discovered this secret, I will look forward to making bánh cuốn a whole lot more.

So today I’ll be sharing the set that I purchased on Amazon, which right now unfortunately appears to be no longer sold (going to share it anyway, so you know how it looks, and what it consists of). The good news is that you actually have options, and I’ll be sharing the sources for that as well. In addition, I’ll be sharing the recipe for the delicious seasoned ground pork mix (you can also use alternative ground meats if you do not eat pork), and lastly, the secrets to creating the (almost) perfect steamed rice sheet. Pay attention, take notes, and have patience. It’s not easy, but over time, you can actually achieve the seemingly impossible.


STEAMED RICE PAPER FILLED WITH SEASONED GROUND PORK ( BÁNH CUỐN )

Degree of difficulty: 5 ( on a scale of 1-5 )

Cook Time: It depends on how many crepes you want to make, but also how developed your skills are. To get an idea though, steaming each crepe takes 45 seconds to 1 minute (but no more than that). Rolling the crepe is a quick 10 seconds. Warning—your first time may not come out as planned, so don’t expect perfection on the first try!


 YOU’LL NEED

  •  A large steamer pot (I purchased the entire set via Amazon here), however since it is sold out, here is an alternative on how to make your own steamer pot at home via Youtube. Another option is to purchase this set on Amazon that comes with fabric, an adjustable metal ring, and bamboo sticks to remove the crepe here. I recommend looking at and studying all three links to get an idea of how the process works. Research is key in cooking!

  •  A flat/thin and long stick at least 18” long to remove the crepe from the sheet (if it already doesn’t come with the set you’ve purchased)

  • A ladle (note: the coconut ladles that come with the sets are way too heavy and difficult to maneuver. I recommend using a good old fashioned ladle right from your kitchen).

  • Cotton/polyester blend fabric. If you are purchasing any of the sets, they should come with a cotton-poly blend fabric. If you are doing your own makeshift version, and have to buy fabric, make sure that it is a cotton-poly blend, which will make removal of the crepe so much easier.

  • A large work surface. I sanitized and wiped a large section of my marble countertop. Then I applied cooing oil and rubbed it generously over the work surface. Keep a bowl of oil and some paper towels handy in case you need to reapply oil.


     INGREDIENTS FOR THE BATTER

  • 2 cups of rice flour

  • ¾ cup of tapioca starch

  • 1/3 cup of potato starch or corn starch

  • ¼ TSP salt

  •  2 TSP vegetable oil

  • 4 cups of water


    INGREDIENTS FOR THE FILLING

  • 1/2 lb of ground pork

  • 1/2 cup of  dried wood ear mushrooms, rehydrated and roughly chopped

  • 1/2 sweet onion, roughly chopped

  • 1 TSP of mushroom seasoning

  •  ¼ TSP salt

  • ½ TBS of fish sauce

  • ½ TSP of freshly ground pepper

  • 1 TSP of sugar


    INGREDIENTS FOR THE TOPPINGS

  • Fresh mint leaves thoroughly rinsed

  • Fresh cilantro, thoroughly rinsed

  • Washed and steamed mung bean sprouts

  • Cucumber, washed and julienned

  • Thinly sliced Vietnamese ham (chả lụa)

  • Fresh fried shallots


    A SIMPLE DIPPING SAUCE

  • 4 TBSP sugar

  • 4 TBSP Fish Sauce

  • 2/3 Cup water

  • TBS Lime

  • 1 thinly sliced Thai chili (seeds removed)


     DIRECTIONS FOR THE BATTER

    1.   Dissolve the flour, salt, and vegetable oil in 4 cups of water. Stir well until the flour is completely blended and dissolved. Let the batter rest for 1 hour, or for an extra silky texture (preferred), let the batter rest overnight. TIP: Before you begin to steam, make sure you mix the batter and water again using your ladle until it is fully blended, since the batter tends to clump up and separate when left to rest. 


    DIRECTIONS FOR THE FILLING

    *Prep your steamer pot as necessary. Add in water until it reaches ¾ of the pot, and cover with the fitted cotton poly sheet (tip: make sure the cloth has been soaked in water before placing it on the top of the pot). Turn the heat onto high and cover with a lid. While you are waiting for the pot to steam up, begin prepping and cooking your meat. 

    **I also like to fill a large pitcher with water and keep the bamboo stick soaked in the water. It allows for smoother removal of the steamed rice sheet. After each use, place the bamboo stick back into the pitcher of water.


    1.   In a medium mixing bowl, season the ground pork with 1 TSP of mushroom seasoning, ¼ TSP of salt, ½ TBS of fish sauce, 1 TSP of sugar, and ½ TSP of freshly ground pepper. Set aside.


    2.   Heat up 1 TBS of cooking oil on high heat. Add the seasoned ground pork to the pan and cook thoroughly until it is no longer pink. Use a spatula to break up the pork, getting a nice fine ground.


    3.   Add in the finely chopped wood ear mushroom and mix well, cooking for about 1 minute.


    4.   Add in the chopped onion and continue to cook until the onion has softened and is translucent, cooking for 1-2 minutes. 


    5.   Transfer to bowl and cover so that it remains warm. Place the bowl in your work station area.

(Apologies for the low quality photos—this was all video shot on iPhone, and then frames were taken from the video)

DIRECTIONS FOR STEAMING AND ROLLING

1.   Make sure your work station is prepped and wiped with oil. Also make sure you have mixed the bowl of batter so that it smooth and consistent. Once the pot comes to a full steam, you are ready to make your rice sheets.

2.   Fill the ladle halfway or ¾ full (how much you ladle on depends on how large your pot/cloth surface is). Starting in the very middle of the cloth surface, ladle the batter on, and while slowly pouring the batter, rotate the ladle clockwise continuously, using the back of the ladle to spread the batter out into a thin and round sheet. Make sure you are not concentrated in the center, but rather working outwards, so that the batter is even throughout. Once it becomes slightly tacky, cover with a lid and set a timer for 45 seconds. Remove the lid, and using the bamboo stick (or any other thin and flat stick you have), gently wiggle it underneath, applying a little pressure to lift the rice sheet off of the cloth. Immediately transfer the rice sheet to your work surface. Then ladle on more batter, repeating the process. Close the lid and go straight to your first completed rice sheet, adding your ground pork mix all over (add just a little—about 2 TBS). Roll your crepe and transfer to a plate.

Tip: The less batter you use, the thinner your rice sheet, but keep in mind that sometimes working with more batter first (to get the hang of it) may be best. Once you become better at it, you can try using less batter and making thinner sheets. Also keep in mind that the sheet will/may have holes in it, which is not a big deal. Once you roll the sheet up with the meat, it’s not noticeable.

3.   While you’re rolling, the next rice sheet is steaming. Once you’ve finished rolling, the next rice sheet (that you’ve already ladled onto the steamer pot) should already be done. You repeat the process until you’ve made the desired amount of rice sheet rolls.

4.   Once you’ve completed all of your rolled rice sheets, transfer them to individual platters, add the toppings, and serve with a simple sweet fish sauce.


Sticky Rice and Chinese Sausage (Xôi Lạp Xưởng)
sticky rice main web.jpg

So I was going to start off writing ‘This is one of my mom’s specialties’, and then I realized how many times I’ve said that on this food blog thus far. I really have to give my mom credit for being so amazing in the kitchen, as her tips and tricks have taught me so much about being a good and efficient cook. Sticky rice and Chinese sausage is one of her go-to’s to make and bring to someone’s house. Why? Because it’s so incredibly easy and delicious. My recipe is a “quick” one, as many recipes require you to soak your sweet glutinous rice overnight (makes the texture more sticky), but from what I can remember, my mom actually will soak it for a good 4-5 hours for a quick ‘whip-it-up-early-in-the-day-and-bring-it-to-a-party’ version. Another time saver—I also cook my sticky rice in my simple and small (3 cup capacity) Tiger brand rice cooker. I’ve learned that some rice cookers tend to burn the rice (especially the larger ones), but I’ve never had that problem with my reliable mini one. As far as Chinese sausage, my mom’s favorite brand to use is California Sausage Inc, so I’ve come to prefer this brand as well, but feel free to use whichever brand works best or is available to you. Again this recipe is a simplified version, but you can also add pork or chicken floss (which I do quit often), Vietnamese sliced ham, or thin strips of egg omelette for a very fancy version—lots of texture and extra yumminess. In the end, the combination of the sweet Chinese sausage with the texture of the sticky rice is good enough to be a star on its own.

STICKY RICE AND CHINESE SAUSAGE (XÔI LẠP XƯỞNG)

Degree of difficulty: 1 ( on a scale of 1-5 )

Preparation time 4-5 hours (for sticky rice to soak; optional: if you have more time, feel free to soak the rice for longer if desired. Overnight is optimal.

Cook Time: 15 minutes for the sticky rice, 8-10 minutes for the Chinese sausage, additional time for other toppings (fried shallots/roughly 10-15 min, scallion oil/5 min)

 YOU’LL NEED

  • A small rice cooker

  • A medium/large frying pan

 INGREDIENTS

  • 1 cup of sweet glutinous rice, soaked in water for 4-5 hours

    ( Tip: want it stickier? Soak for an extra hour or two. Want it extra sticky? Soak it overnight )

  • 1/4 TSP sea salt

  • 2 TSP neutral cooking oil (for the sticky rice)

  • 1 TPS neutral cooking oil (for the Chinese sausage)

  • 1/2 cup of sliced Chinese sausage

  • Pork or chicken floss (optional topping)

  • Scallion oil

  • Fresh fried shallots (I recommend prepping this before hand or even the day before)

 DIRECTIONS

  1. After your cup of sweet rice has soaked for about 4-5 hours (or more), strain the rice, wash it thoroughly, and transfer it to your rice cooker pot. Give the pot a nice shake to even out the rice, and add just enough water to barely cover the surface (since it has been pre-soaking, it does not need that much water). Add 1/2 TSP of salt and 2 TSP of cooking oil. Turn on your rice cooker (it should automatically cook for about 15 minutes).

  2. Once the rice has finished cooking, immediately remove it from heat, and use the rice cooker spoon/spatula to mix the rice well. Allow the sticky rice to cool.

  3. While the rice is cooling, heat up 1 TSP of neutral cooking oil in a non-stick frying pan on medium heat. Allow the oil to heat up for about a minute or two, the add in your slices of Chinese sausage in an even layer across the pan.

  4. Using cooking tongs, turn the sausages every minute to get a nice and even cooking (you want to avoid burning the surface of the sausage slices). It should take about 8-10 minutes to finish cooking. Remove from heat and set aside.

  5. Now transfer the sticky rice to a plate. If you are using pork or chicken floss, add it on top of the rice. Arrange your pieces of Chinese sausage directly on top of the rice (or if you’re using the pork/chicken floss, place the sausage on top of that). Gently spoon your scallion oil on top of the Chinese sausage, and then finally, sprinkle some fresh fried shallots on top. Enjoy!

Scallion Oil (Mo Hanh)
scallion oil main web.jpg

Scallion oil (also known as mo hanh) is one of those condiments that is so easy to make, you wonder why you should even post a recipe. But sometimes having a frame of reference is good for the self professed ‘useless in the kitchen’ type people. You’ll find that it’s used quite often in countless Vietnamese dishes. You can pretty much eat it with anything; its delicious over over meats, vermicelli, rice—anything and everything. You first saw it on this blog in my recipe for beef wrapped betel leaves. This will probably be my easiest recipe I’ll post. Enjoy!

TIP: if you happen to also be making fresh fried shallots, you can actually use the oil from cooking the shallots, and pour it over the heat-safe bowl of sliced scallions directly after cooking your shallots. This saves you from wasting oil, but also adds more depth in flavor to your scallion oil

SCALLION OIL (MO HANH)

Degree of difficulty: 1 ( on a scale of 1-5 )

Preparation time 5 min

Cook Time: 3 minutes

 YOU’LL NEED

  • A small saucepan

 INGREDIENTS

  • 1 bunch of organic scallions, washed thoroughly, and sliced into 1/8”-1/4” slices

  • 1/2 cup of neutral oil, like safflower, grapeseed, or canola oil

 DIRECTIONS

  1. Place your sliced scallions in a heat-safe bowl. Set aside.

  2. On medium-high heat, heat up your 1/2 cup of neutral oil. Allow about 3 minutes for it to fully heat up nicely. You’ll know it’s done when you drop in a single piece of sliced scallion, and it sizzles and rises to the top.

  3. After 3 minutes have passed, remove from heat and allow the oil to rest for about 20 seconds. After 20 seconds have passed, pour the oil over the bowl of scallions.

  4. Stir gently to allow the scallions to release their fragrance into the oil. Voila!

Beef Wrapped in Betel Leaves (Bò Lá Lốt)
la lot web 2.jpg

Beef wrapped in betel leaves, also know as Bò Lá Lốt, is another one of my favorites from mom’s kitchen growing up (and of course to this day). Per usual, my mom didn’t really give me any measurements, and was very vague when describing how to make this, so I winged it, and here we are. I’ve actually made several versions of this dish (one of which was an absolute disaster when I decided to add an extra ingredient that made it far too salty—and to make matters worse, I gave some plates to my friends without even tasting it first! D-OH!). Not to worry! I fixed it, perfected the recipe, and am now sharing it with you. Not gonna lie, mistakes happen often in my kitchen, but I am always determined to keep going until I get it right. Now I have the proper measurements and balance of flavors, and can always refer back to this recipe as needed.

Traditionally, bò lá lốt is cooked over a grill, but I live in New York City, where I have no easy access to the outdoors or a proper grill for that matter. My mom has always cooked this dish in a frying pan, and I find that doing so actually makes it tastier, since it cooks in its own juices, and stays moist and extra flavorful. The betel leaf is a very fragrant leaf that is chock full of vitamins, and are a great source of calcium. There is something so distinct about the scent of the leaves (a lovely almost peppery scent), and it transfers into the flavor of the dish beautifully.

So I don’t make bò lá lốt very often for two reasons: 1) the leaves are extremely difficult to find in New York (I’ve only found them in one store in Manhattan, and they are always costly and sold out), and 2) it can be quite time consuming to prepare (but so worth it in the end). My tips for making this dish? Lots of patience (clear your day, take your time, and enjoy the process), use a high quality beef, and don’t skip out on the toppings and dipping sauce. I hope you enjoy this recipe and please share with me your results/photos!

BEEF WRAPPED IN BETEL LEAVES / BÒ LÁ LỐT

Degree of difficulty: 4 (on a scale of 1-5)

Preparation time: Roughly 45 minutes

Cooking time: Roughly 10 min per skewer (5-6 min each side)

 YOU’LL NEED

  • Yakitori skewer sticks (roughly 9” long)

  • A meat cleaver (optional)

  • A large work surface

  • A large non-stick frying pan

  • A mesh anti-splatter screen (optional)


INGREDIENTS ( serves 4-6 people )

  • 1 pound of coarsely ground steak of choice (I purchased thinly pre-sliced rib-eye beef from H-mart, and used a meat cleaver to chop it up coarsely) other steak cuts of choice are flank or bavette. If you are on a time crunch, feel free to use pre-packaged grass fed ground beef

  • 1 cup of finely chopped shallots

  • 1 TBS fish sauce

  •  1 TBS oyster sauce

  • 1 TSP sugar

  • 1 TSP ground white pepper

  • 1 TSP chili garlic sauce

  • 50-60 Large betel leaves, stems trimmed off, thoroughly washed/cleaned, and wiped dry

  • ¼ cup of shallot or garlic infused oil (I used the oil that I used to fry my crispy fried shallots to top this dish with)

  • Scallion oil (for drizzling over vermicelli)

  • Crispy fried shallots (topping)

  • Crushed peanuts (topping)


DIRECTIONS

  1. On a large cutting board surface, coarsely chop your steak/beef well using a heavy duty meat cleaver (if you are using pre-packaged ground beef, you can skip this step). Set aside.

  2.  In a large mixing bowl, combine 1 lb of coarsely chopped or ground beef, 1 cup of finely chopped shallots, 1 TBS of fish sauce, 1 TSP of sugar, 1 TBS of oyster sauce, 1 TSP of chili garlic sauce, 1 TSP of ground white pepper, and ¼ cup of your garlic or fried shallot infused oil. Mix well using your hands. 

  3. On a large work surface, lay your betel leaves glossy side down. Apply the marinated meat mixture (as shown in photo above), leaving about 1/4” from the sides. Roll the leaf starting at the pointy tip and finishing towards the trimmed stem of the leaf. Pierce the leaf neatly with two bamboo skewers (see photo above). Using two skewers will help keep the wrapped leaves intact, since it provides more stability. I placed about 6 beef rolls per skewer set. 

  4.  Heat up about 1 TBS of cooking oil on medium heat in a large frying pan. Allow a couple of minutes for the oil to heat up nicely. Place two skewers in the pan. Pan fry until cooked through, making sure to flip sides for even heat distribution (5-6 minutes per side). Tip: It helps to use an anti-splatter shield while cooking. Set your cooked skewers aside on a plate, and continue pan frying until all desired skewers are cooked.

  5.  Serve on a bed of vermicelli, drizzled with scallion oil. Top with crushed dry roasted peanuts and fried shallots. Serve with pineapple dipping sauce.

Fried Crispy Seasoned Pork Bites (Bánh Tráng Chiên Giò Sống)
crispy pork bites web.jpg

Fried crispy seasoned pork bites also known as bánh tráng chiên giò sống—another dish inspired from my mom’s kitchen. I don't remember when my mom started making these, I just know that I loved standing there and eating them fresh, hot, and extra crispy, as she was frying them. Obviously I ruined my appetite with these little ăn nhậu ( to snack/drink) bites, but it was always worth it. I had never had this anywhere else but at home, so I wasn’t sure if it was an actual dish, but I looked it up recently, and it’s a real thing (at least different variations of it)! The best part about it is that it is insanely easy to make. It’s a great appetizer to have at parties, the kids love it, and it also pairs perfectly with a cold beer. Recipe below!

FRIED CRISPY SEASONED PORK BITES / BÁNH TRÁNG CHIÊN GIÒ SỐNG

Degree of difficulty: 1 (on a scale of 1-5)

Preparation time 15 minutes

Cooking time: 10-12 minutes

YOU’LL NEED

  •  A medium to large food processor

  •  A medium frying pan

  • A medium mixing bowl

 INGREDIENTS (makes roughly 36 bite sized pieces)

  • ½ pound of organic ground pork (you can sub with ground beef or ground chicken if you don’t eat pork)

  • ¼ TSP sea salt

  • ½ TSP freshly ground pepper

  • ½ TSP sugar

  • 1 TSP fish sauce

  • 2 TSP minced garlic

  • ¼ TSP baking powder (I used Alsa brand baking powder)

  • ½ TSP water

  • 4-6 sheets of round rice paper


DIRECTIONS 

  1. In a medium sized bowl, mix together your ground pork, salt, pepper, sugar, garlic, and fish sauce. Mix well.

  2. In a small bowl, combine the water and the baking powder, and immediately mix well with a small spoon until it begins to foam, then add it to the ground pork mix, and once again, mix well (I like to mix with my hands).

  3. Placed the meat mix in a medium sized food processor, and process the meat until a fine paste is formed (about 2-3 min).

  4. Place a piece of dry rice paper on a flat work surface. Using a large spoon or small spatula, spread the paste evenly on the rice paper, getting as close to the edges as you can. The thickness of the paste should be about 1/8”, and no thicker than ¼” (see photo above). 

  5. Place another sheet of dry rice paper directly on top, lining up the edges. Smooth it out using your hands, and lightly push the meat mixture so that it is even and spread towards the edges.

  6. Using a pair of kitchen scissors, cut roughly 2” strips, and then cut the strips into bite sized pieces. If the rice paper curls up, don’t worry about it. It’s not meant to be perfect! Place the bite sized pieces on a large plate, separating the pieces so that they don’t touch (the rice paper will get moist and cause the pieces to stick together).

  7. Heat a frying pan on medium high, and coat the bottom of the pan with a neutral high-heat oil (safflower, canola, or grapeseed oil). Give it a few minutes to heat up properly, and then gently add in your bite sized pieces. Pan fry the pieces until they are a light golden brown, turning/flipping them when necessary. You may need to turn your heat down to medium so that they don’t burn. Each side should take 2-3 minutes each, but make sure you keep an eye on it while it is cooking. 

  8. Transfer to a bed of napkins, and then to a serving platter. 

Tofu, Tomatoes, and Pork Spare Rib Soup
pork tofu canh.jpg

In Vietnamese culture, you have your everyday meals and your special meals. Everyday meals are easy, ‘throw it together’ dishes that are uncomplicated, comforting, and made for weekly rotation. This particular soup (soups are commonly known as a ‘canh’ in Vietnamese), is one of my absolute favorites for the ‘everyday’ category, and something that I’ve been cooking for the longest time. It’s so ridiculously easy (like most Vietnamese soup/canhs are), and though usually eaten with rice, can also be eaten alone. The only thing different from the way I make mine (as opposed to my parents) is that I purchase the pre-cut pork spare ribs at my local H-mart, so that I don’t have to deal with cleaving my own meat, which I find time consuming, and messy (yes, this is a shortcut!). If you don’t like to deal with bones, I recommend purchasing a pound of pork shoulder, and cutting the meat into cubes. Avoid pork loin, as it can be dry and less juicy in this soup form. I also typically brown the pork spare ribs in a separate pan before placing it in the pot. It gives the meat color and some added texture, but this step is not necessary, and can actually be skipped if you want to cut down on time. I will say that in the past, I gave everyone a general idea of how to make this soup (blame my parents for never measuring anything, ever), however, this time around, I made sure to write down specific measurements for each ingredient so that you have a consistent result each time you make it. The result: a savory soup, packed full of flavor, with mouthwatering, almost ‘fall off the bone’ pork spare ribs. I hope you enjoy this everyday meal as much as I do.

TOFU, TOMATOES, AND PORK SPARE RIB SOUP / CANH

Degree of difficulty: 1 (on a scale of 1-5)

Preparation time 15 min

Cooking time: 2 hours


YOU’LL NEED

  •   A 5.5 quart pot

  •  A non-stick frying pan

INGREDIENTS

  • 6 tomatoes on the vine, quartered

  • 1 x 16 oz package of organic firm tofu, sliced into roughly ½ thick x 1” wide x 1.5” long pieces

  •  1.5 lbs pre-cut spork spare ribs, rinsed, and patted dry

  •  13 cups of water

  •  1 TBS chicken stock powder

  • 2 tsp salt

  •  2.5 TBS fish sauce

  • ¼ cup thiny sliced scallions

  • ¼ cup roughly chopped cilantro

  • Freshly ground pepper

 DIRECTIONS

**Before you begin, place your pork rib bones in a strainer, and gently scrub all the bones with sea salt. Rinse off all of the salt thoroughly. This removes the ‘porky’ flavor, for a better flavor profile.

  1.  Add a couple of tablespoons of cooking oil to a frying pan on med-high heat. Brown each side of the pork spare ribs (this step can be skipped if you are short on time).

  2.  Add the pork spare ribs to a 5.5 qt stockpot, and add 13 cups of hot water. Bring to a boil.

  3.   After the water has come to a full boil, reduce to medium-low, add 2 teaspoons of salt and 1 TBS of chicken stock powder. Allow the soft simmer to build the broth base for 2 hours. During the simmer time (after about an hour of simmering), gently skim the scud from the surface until the broth is clear of any impurities that have risen to the top, and continue to do so until the surface is free of impurities.

  4.  Once you have finished simmering for two hours, add in your 2.5 TBS of fish sauce. Then add in your sliced tofu chunks and your quartered tomatoes. Bring the heat back up to a gentle boil, and then reduce again to medium-low (a gentle simmer), and cook for an additional 20 minutes.

  5.  After the tofu and tomatoes have been stewing for 20 minutes, turn off the heat. Taste the broth and add additional salt or fish sauce, only if necessary.

  6.  Top generously with sliced scallions, chopped cilantro, and freshly ground pepper. Serve with fluffy jasmine rice, or eat alone as a soup.

Vietnamese Chicken Congee (Cháo Gà)
chao ga web.jpg

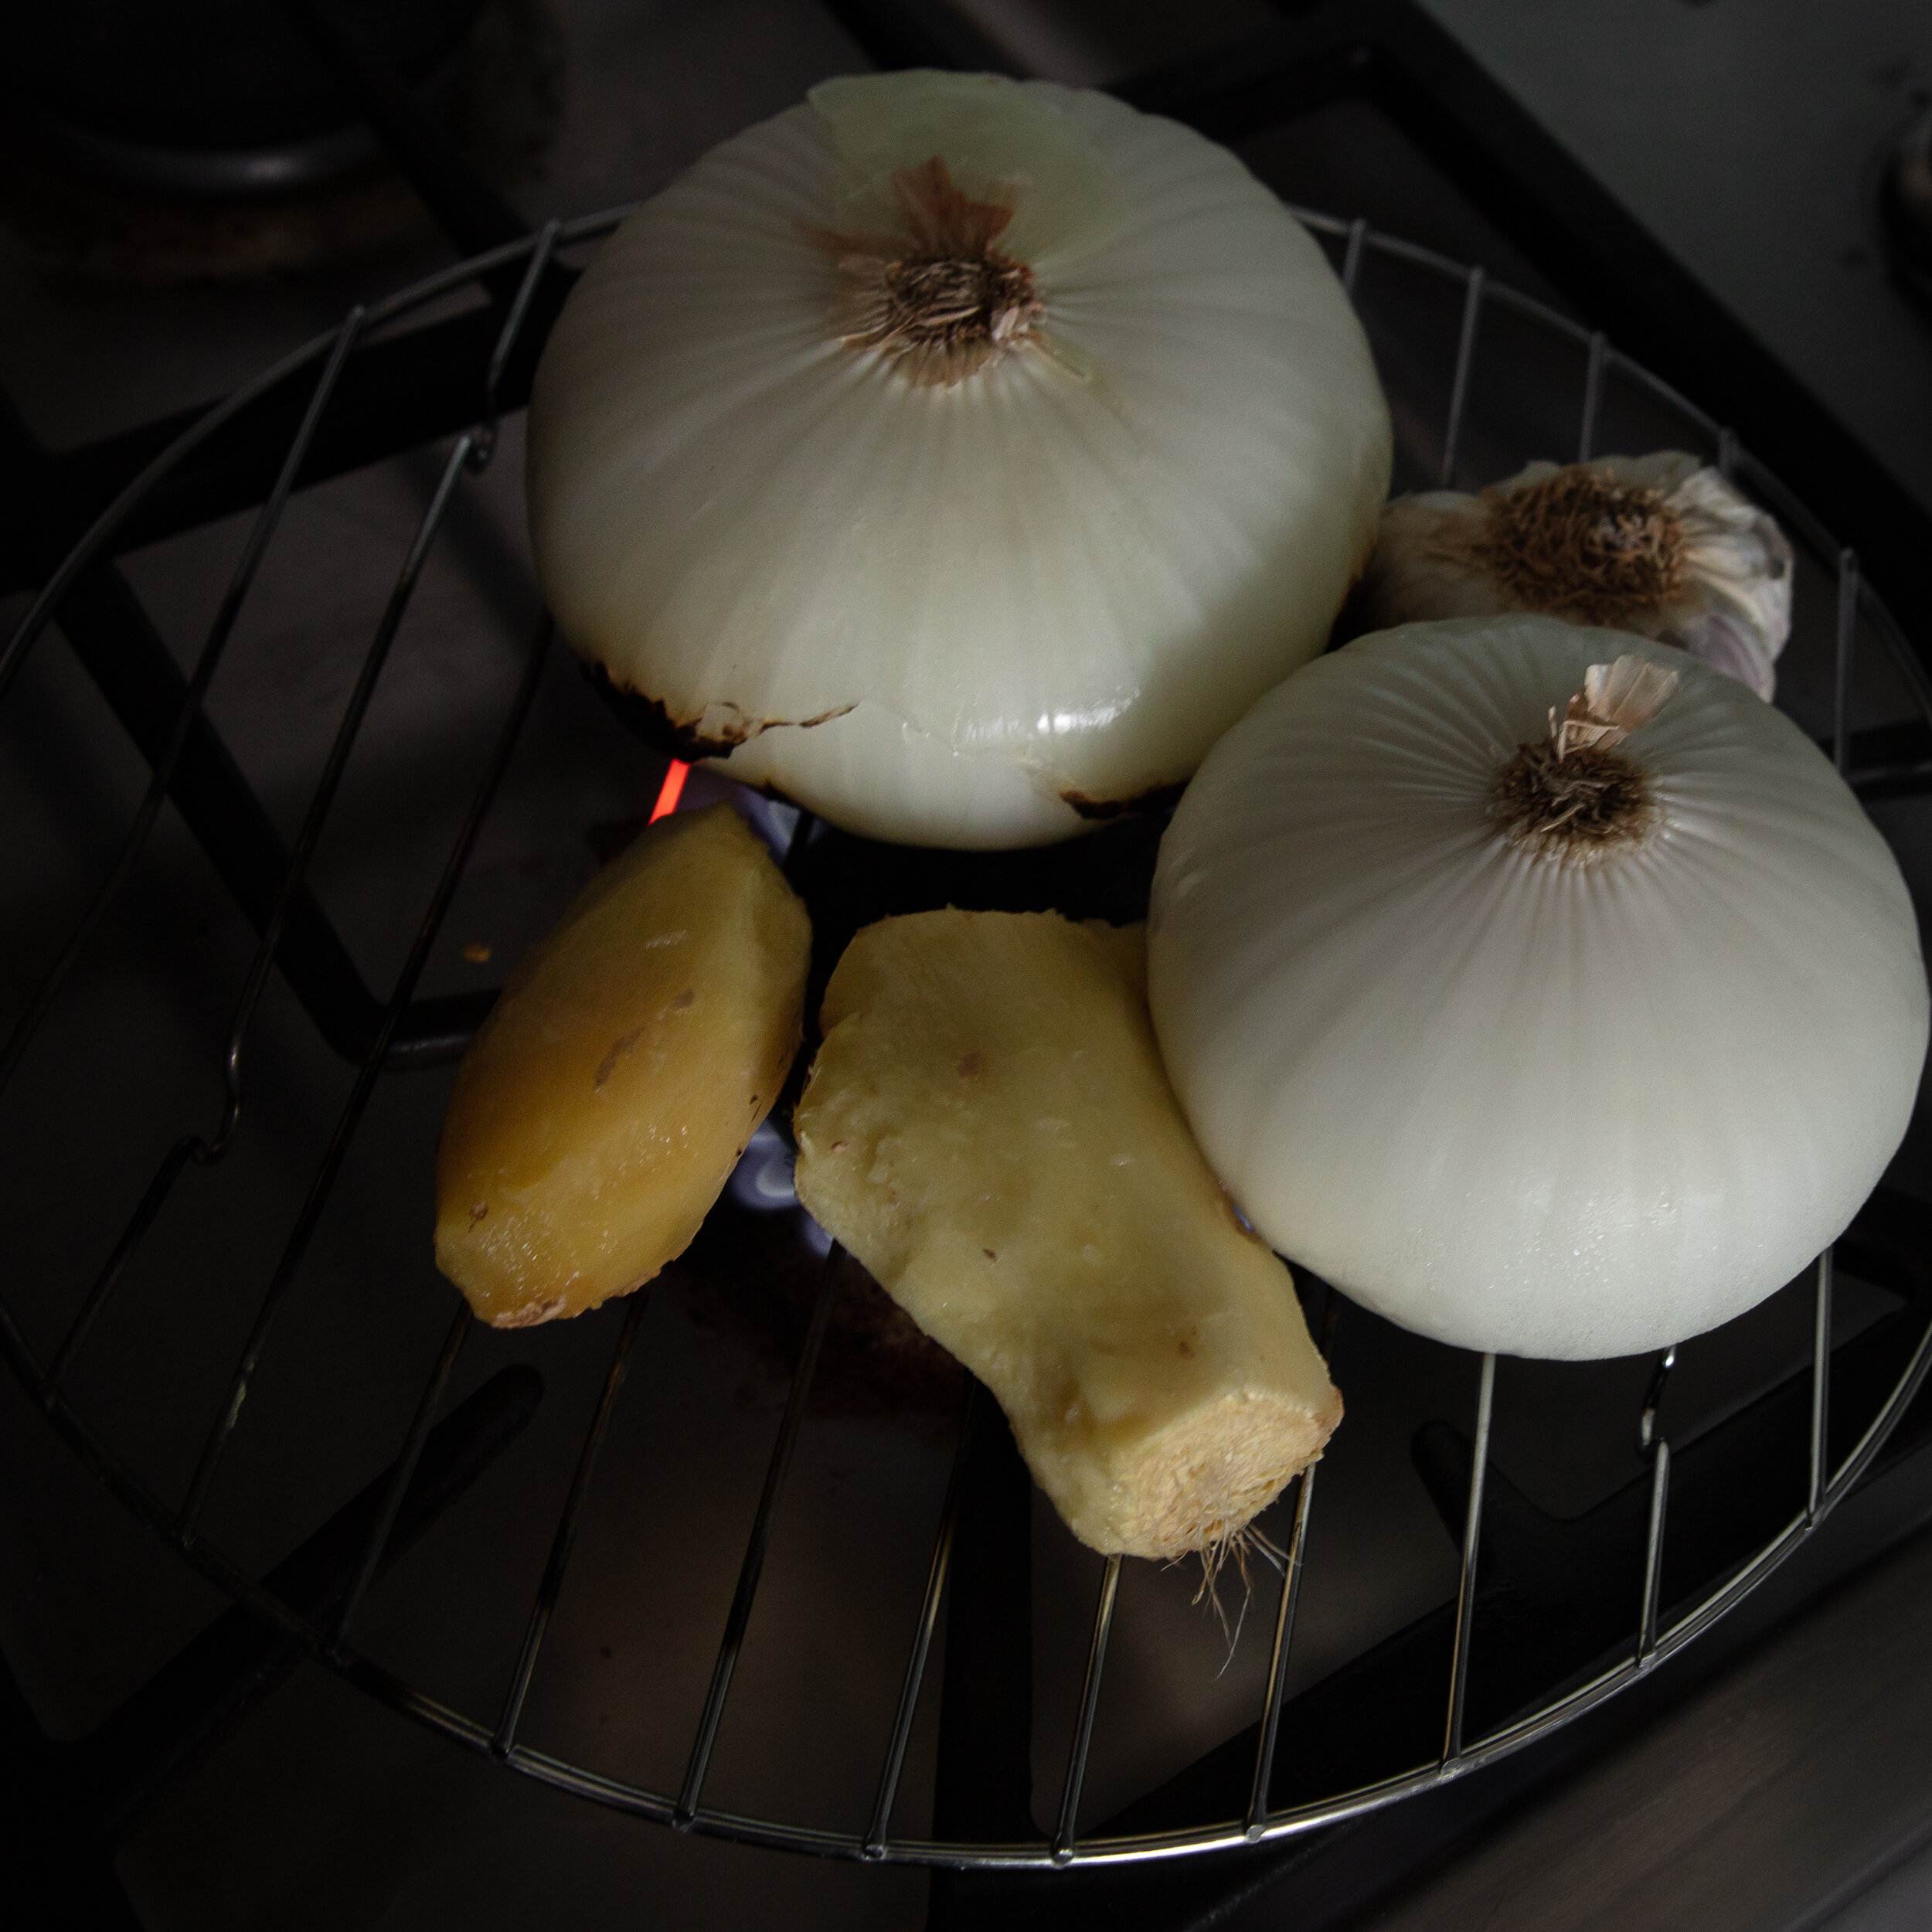
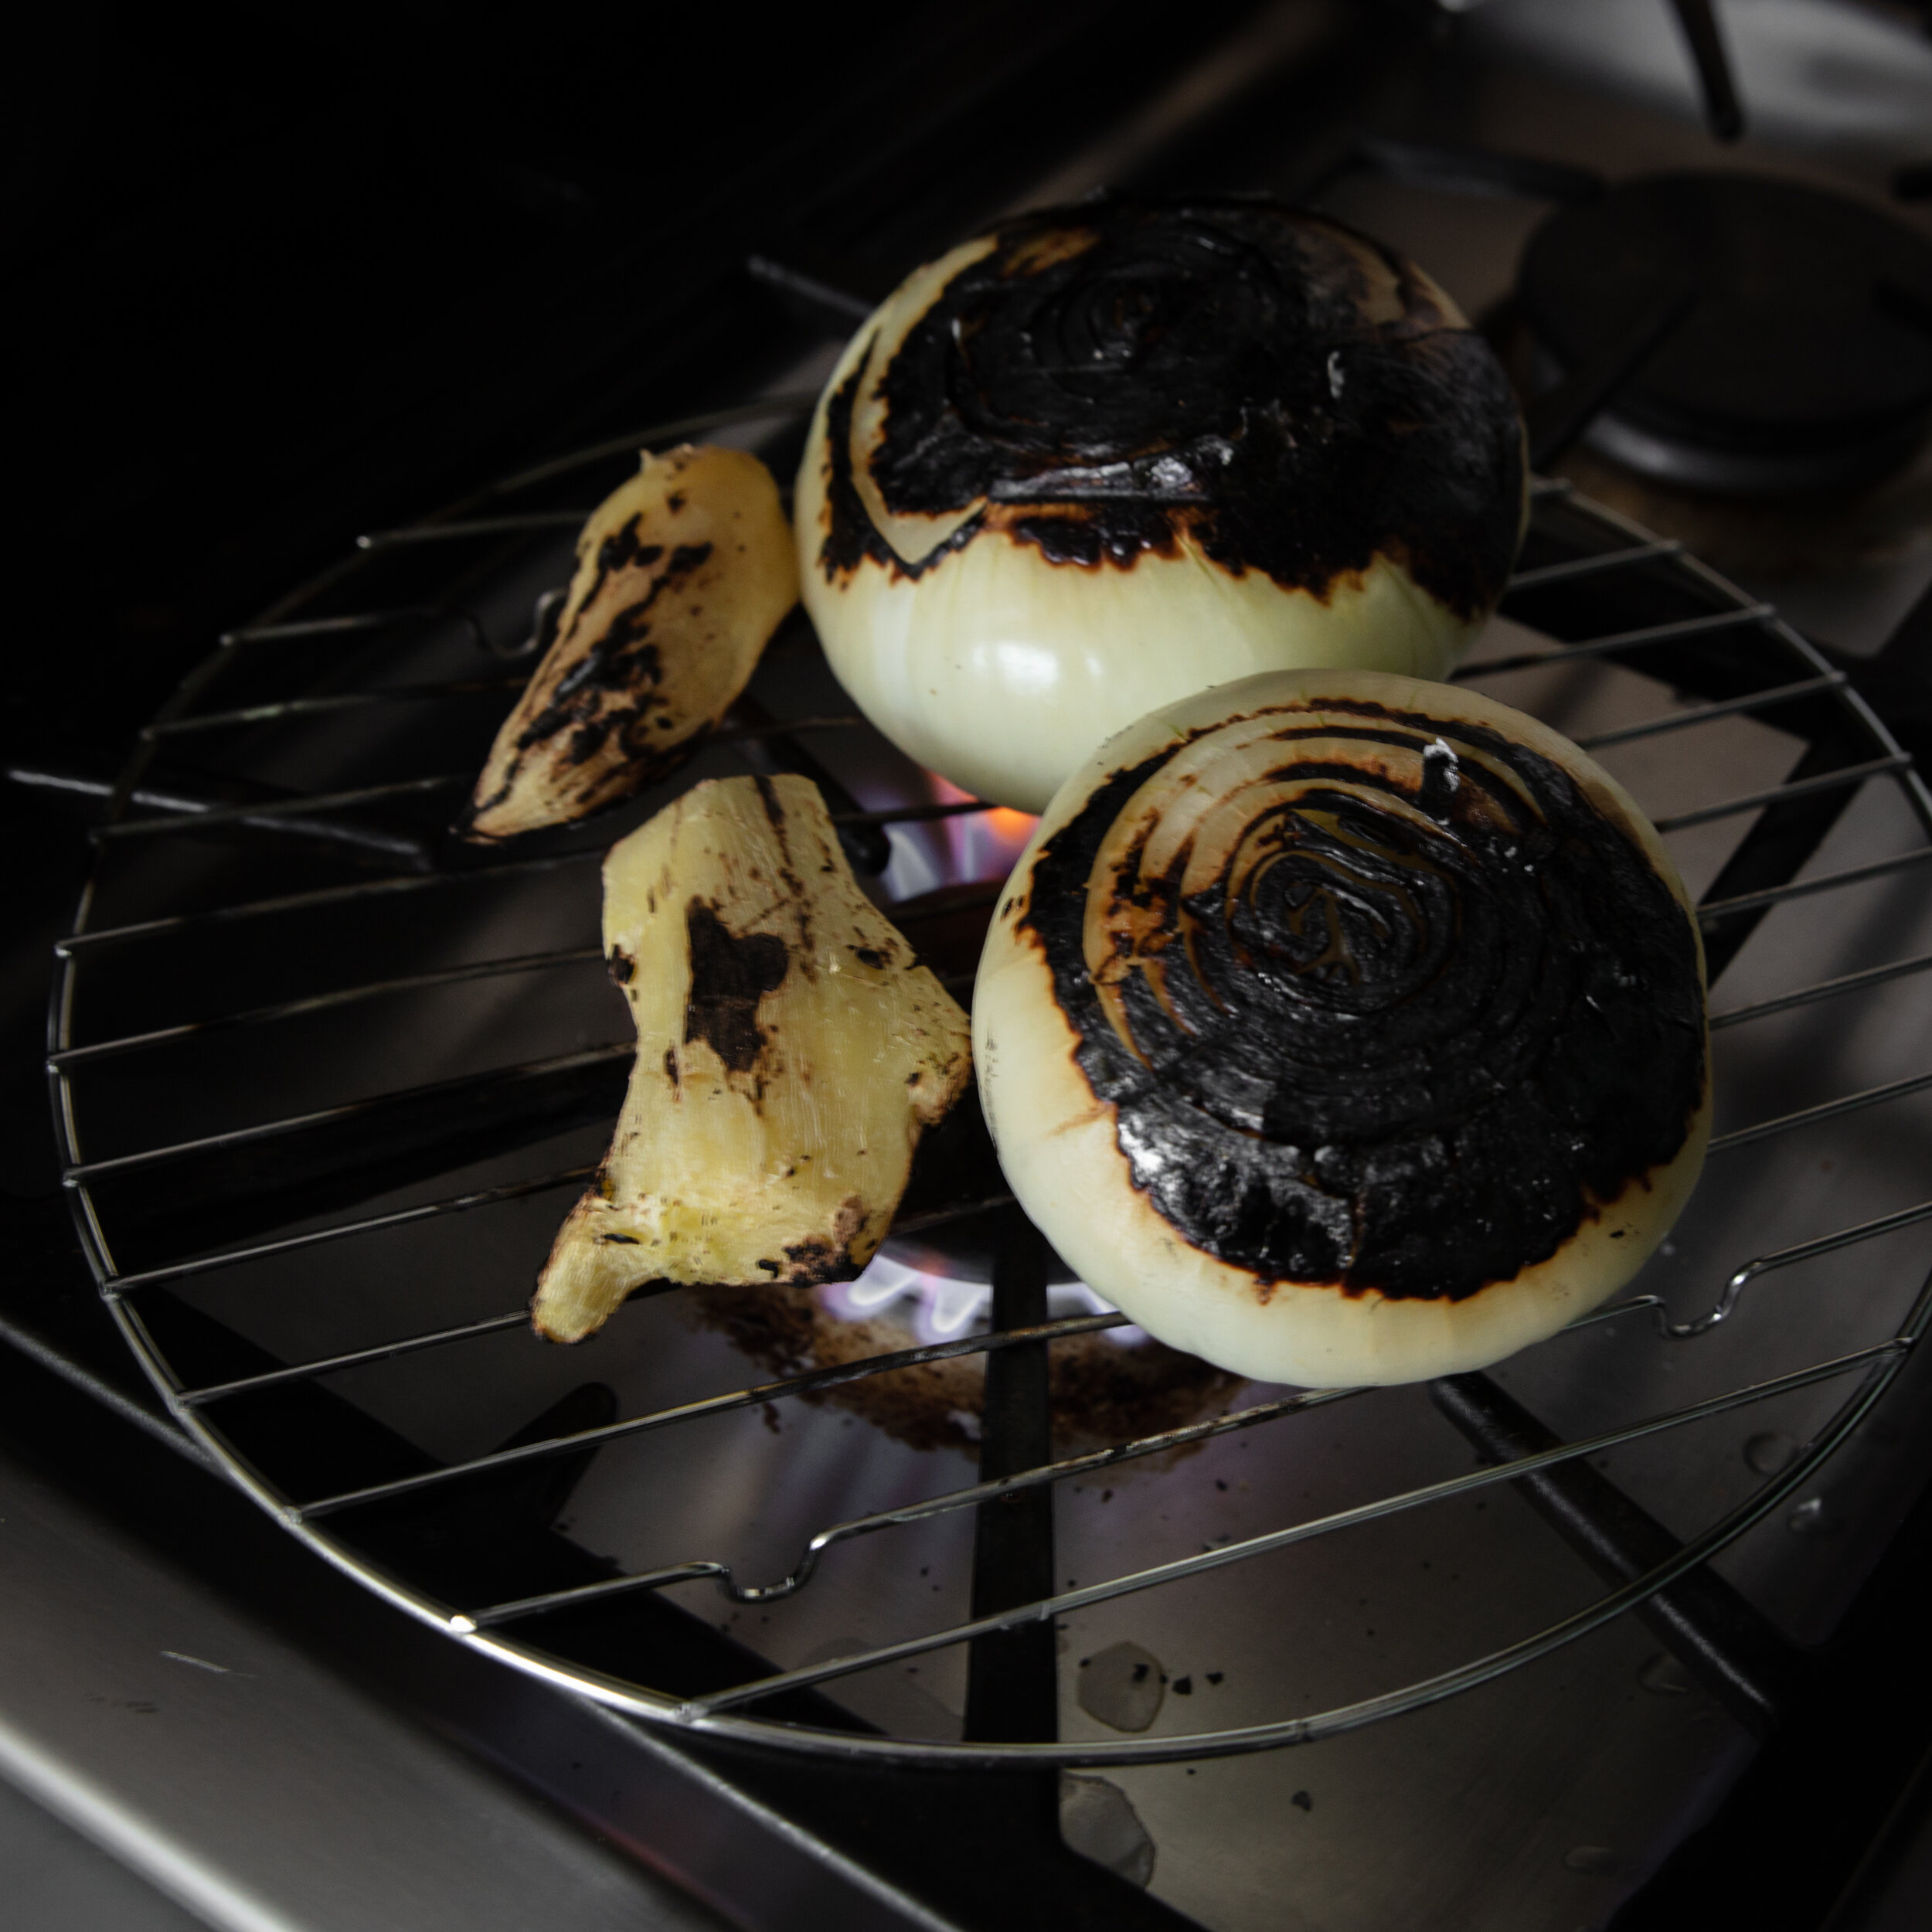
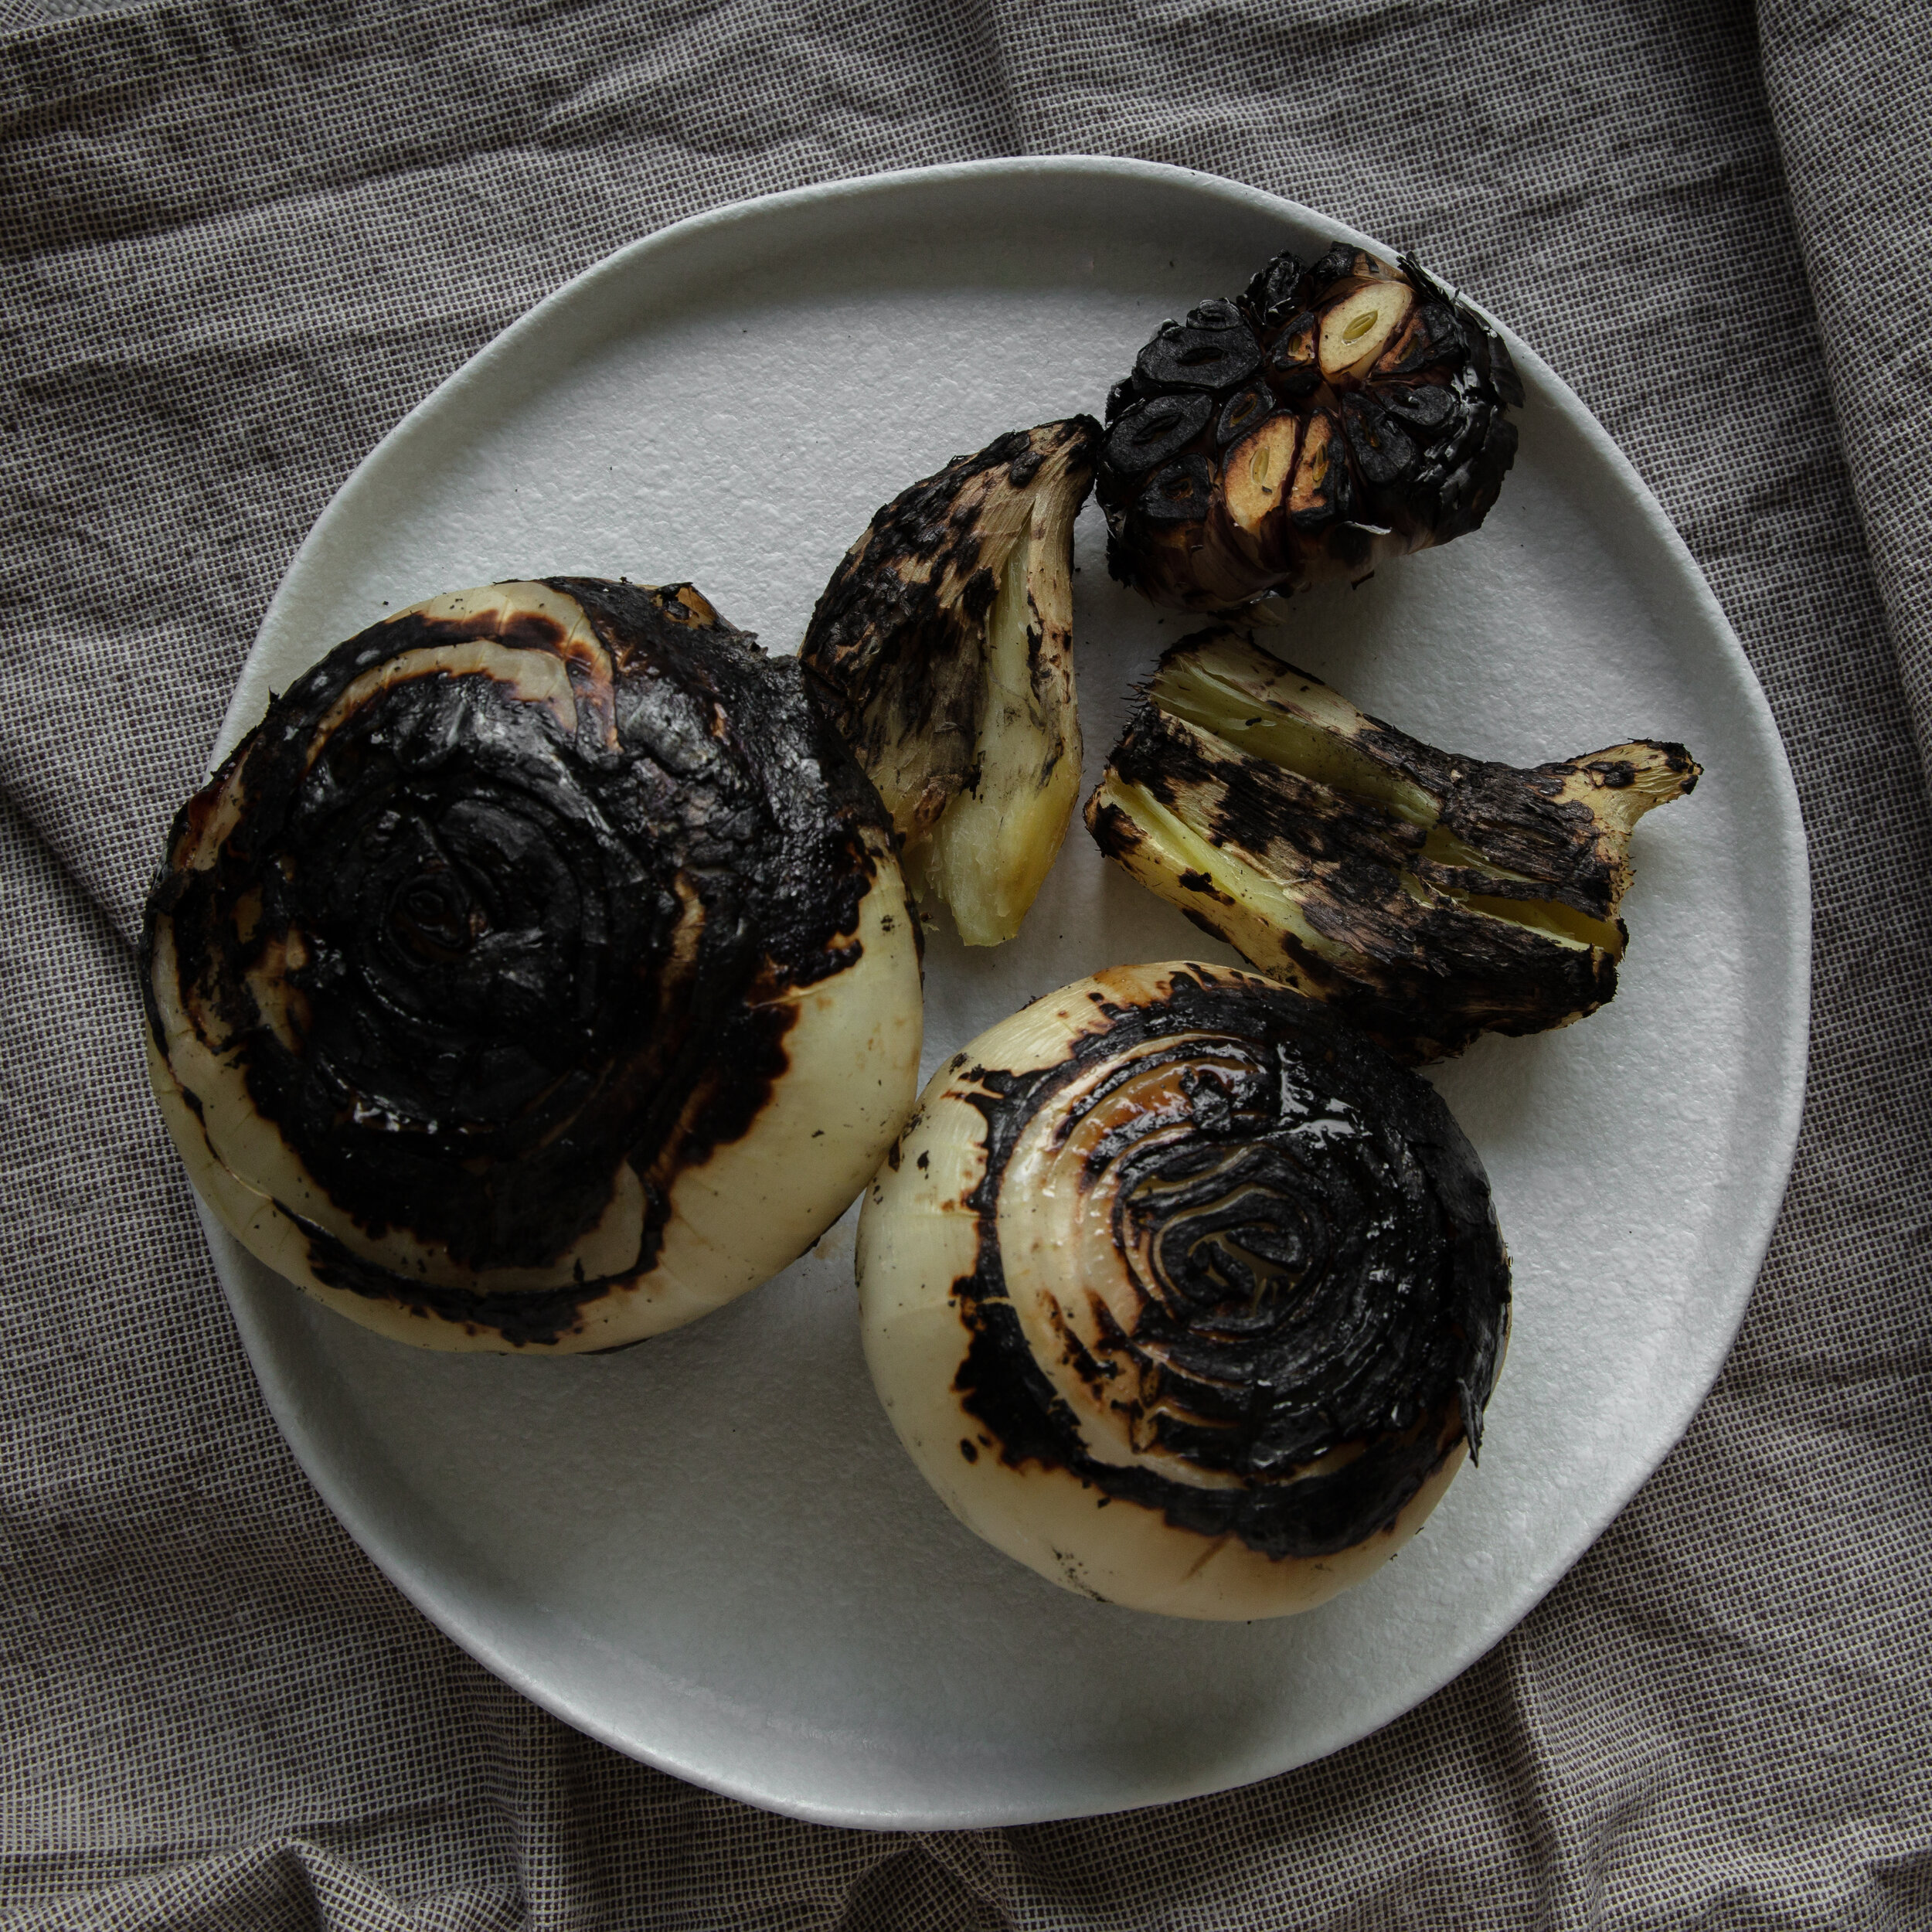
In the world of Vietnamese cuisine, chicken congee, also known as cháo gà, is arguably the most comforting dish one can eat. As of lately, we definitely need this level of culinary comfort in our lives (2021 is no joke). I approach my chicken congee the way I approach most of my Vietnamese dishes involving chicken broth. I level up by adding an extra layer of complexity to the broth by charring the veggies in my broth base. Yes it’s not the traditional way to make chicken congee, but when it comes to the kitchen, experimentation is key to becoming a good cook, and I’m all about breaking the rules. Ginger, garlic, and onion are charred on the surface to give an otherwise plain broth a little extra oomph. Normally we do this with phở, but wouldn’t it be special if we did it with congee? Note that you can skip this step if you are short on time, or have little patience. The thing about an amazing chicken congee is that it requires patience and time though. The best dishes do. There is nothing that compares to a homemade broth prepared with thoughtfulness, especially when they are simple dishes. If you have the palate, you appreciate the complexities a lot more. Now the only shortcut I take when making chicken congee is that I don’t boil a whole chicken to make the broth. I prefer dark meat as my topping (juicier, more flavor IMO), so I purchase chicken thighs (bone and skin on). It also makes the broth a lot easier to handle, but that’s not why I do it. Feel free to boil a whole chicken (offal removed), or use white meat only if you prefer. Just make sure you leave the bone and skin on so that the broth gets its bone-rich flavor as it develops. Finally, lets talk about toppings. Chicken congee is nothing, and I mean absolutely nothing without Vietnamese coriander (rau răm), slivered scallions, freshly ground pepper, a squeeze of lime, and you guessed it—fresh fried shallots. So make sure you don’t skip out on all 5 of these. I also like to add a small dash of Maggi seasoning right before eating (even though it really doesn’t need it). So ladies and gents, I present to you my Vietnamese Chicken Congee. Bon appétit!

VIETNAMESE CHICKEN CONGEE (CHÁO GÀ)

Degree of difficulty: 2 (on a scale of 1-5)

Preparation + cooking: 2 hours

  YOU’LL NEED

  • Cheesecloth + string

  • A grill wire rack or rack and pan (if using a handheld torch) for charring

  • A large stockpot

 INGREDIENTS (serves 4-6 people)

  • 4 lbs of chicken thighs, skin bone on (I used two packages of 4 thighs/package)

  • 15 cups of water

  • ¾  cup of sweet rice, washed and strained

  • ¾  cup of short grain rice, washed and strained

note: you can also use brown rice if you are being health conscious--and if you are, I recommend pre-soaking it for a few hours before hand, as brown rice takes longer to cook.

  •  One 4-5” piece of ginger, peeled

  • 2 large yellow onions

  • 1 head of garlic, with the bottom third of it sliced off crosswise

  •  9 black peppercorns

  • 1 TBS chicken stock powder

  • 1 TBS fish sauce

  • 1 TBS salt

  • 3 TSP sugar

  • Lime wedges

  • Vietnamese Coriander (rau răm) 

  • Fresh crispy fried shallots

  • Scallions (the lower 2”), rinsed and sliced into slivers

 DIRECTIONS

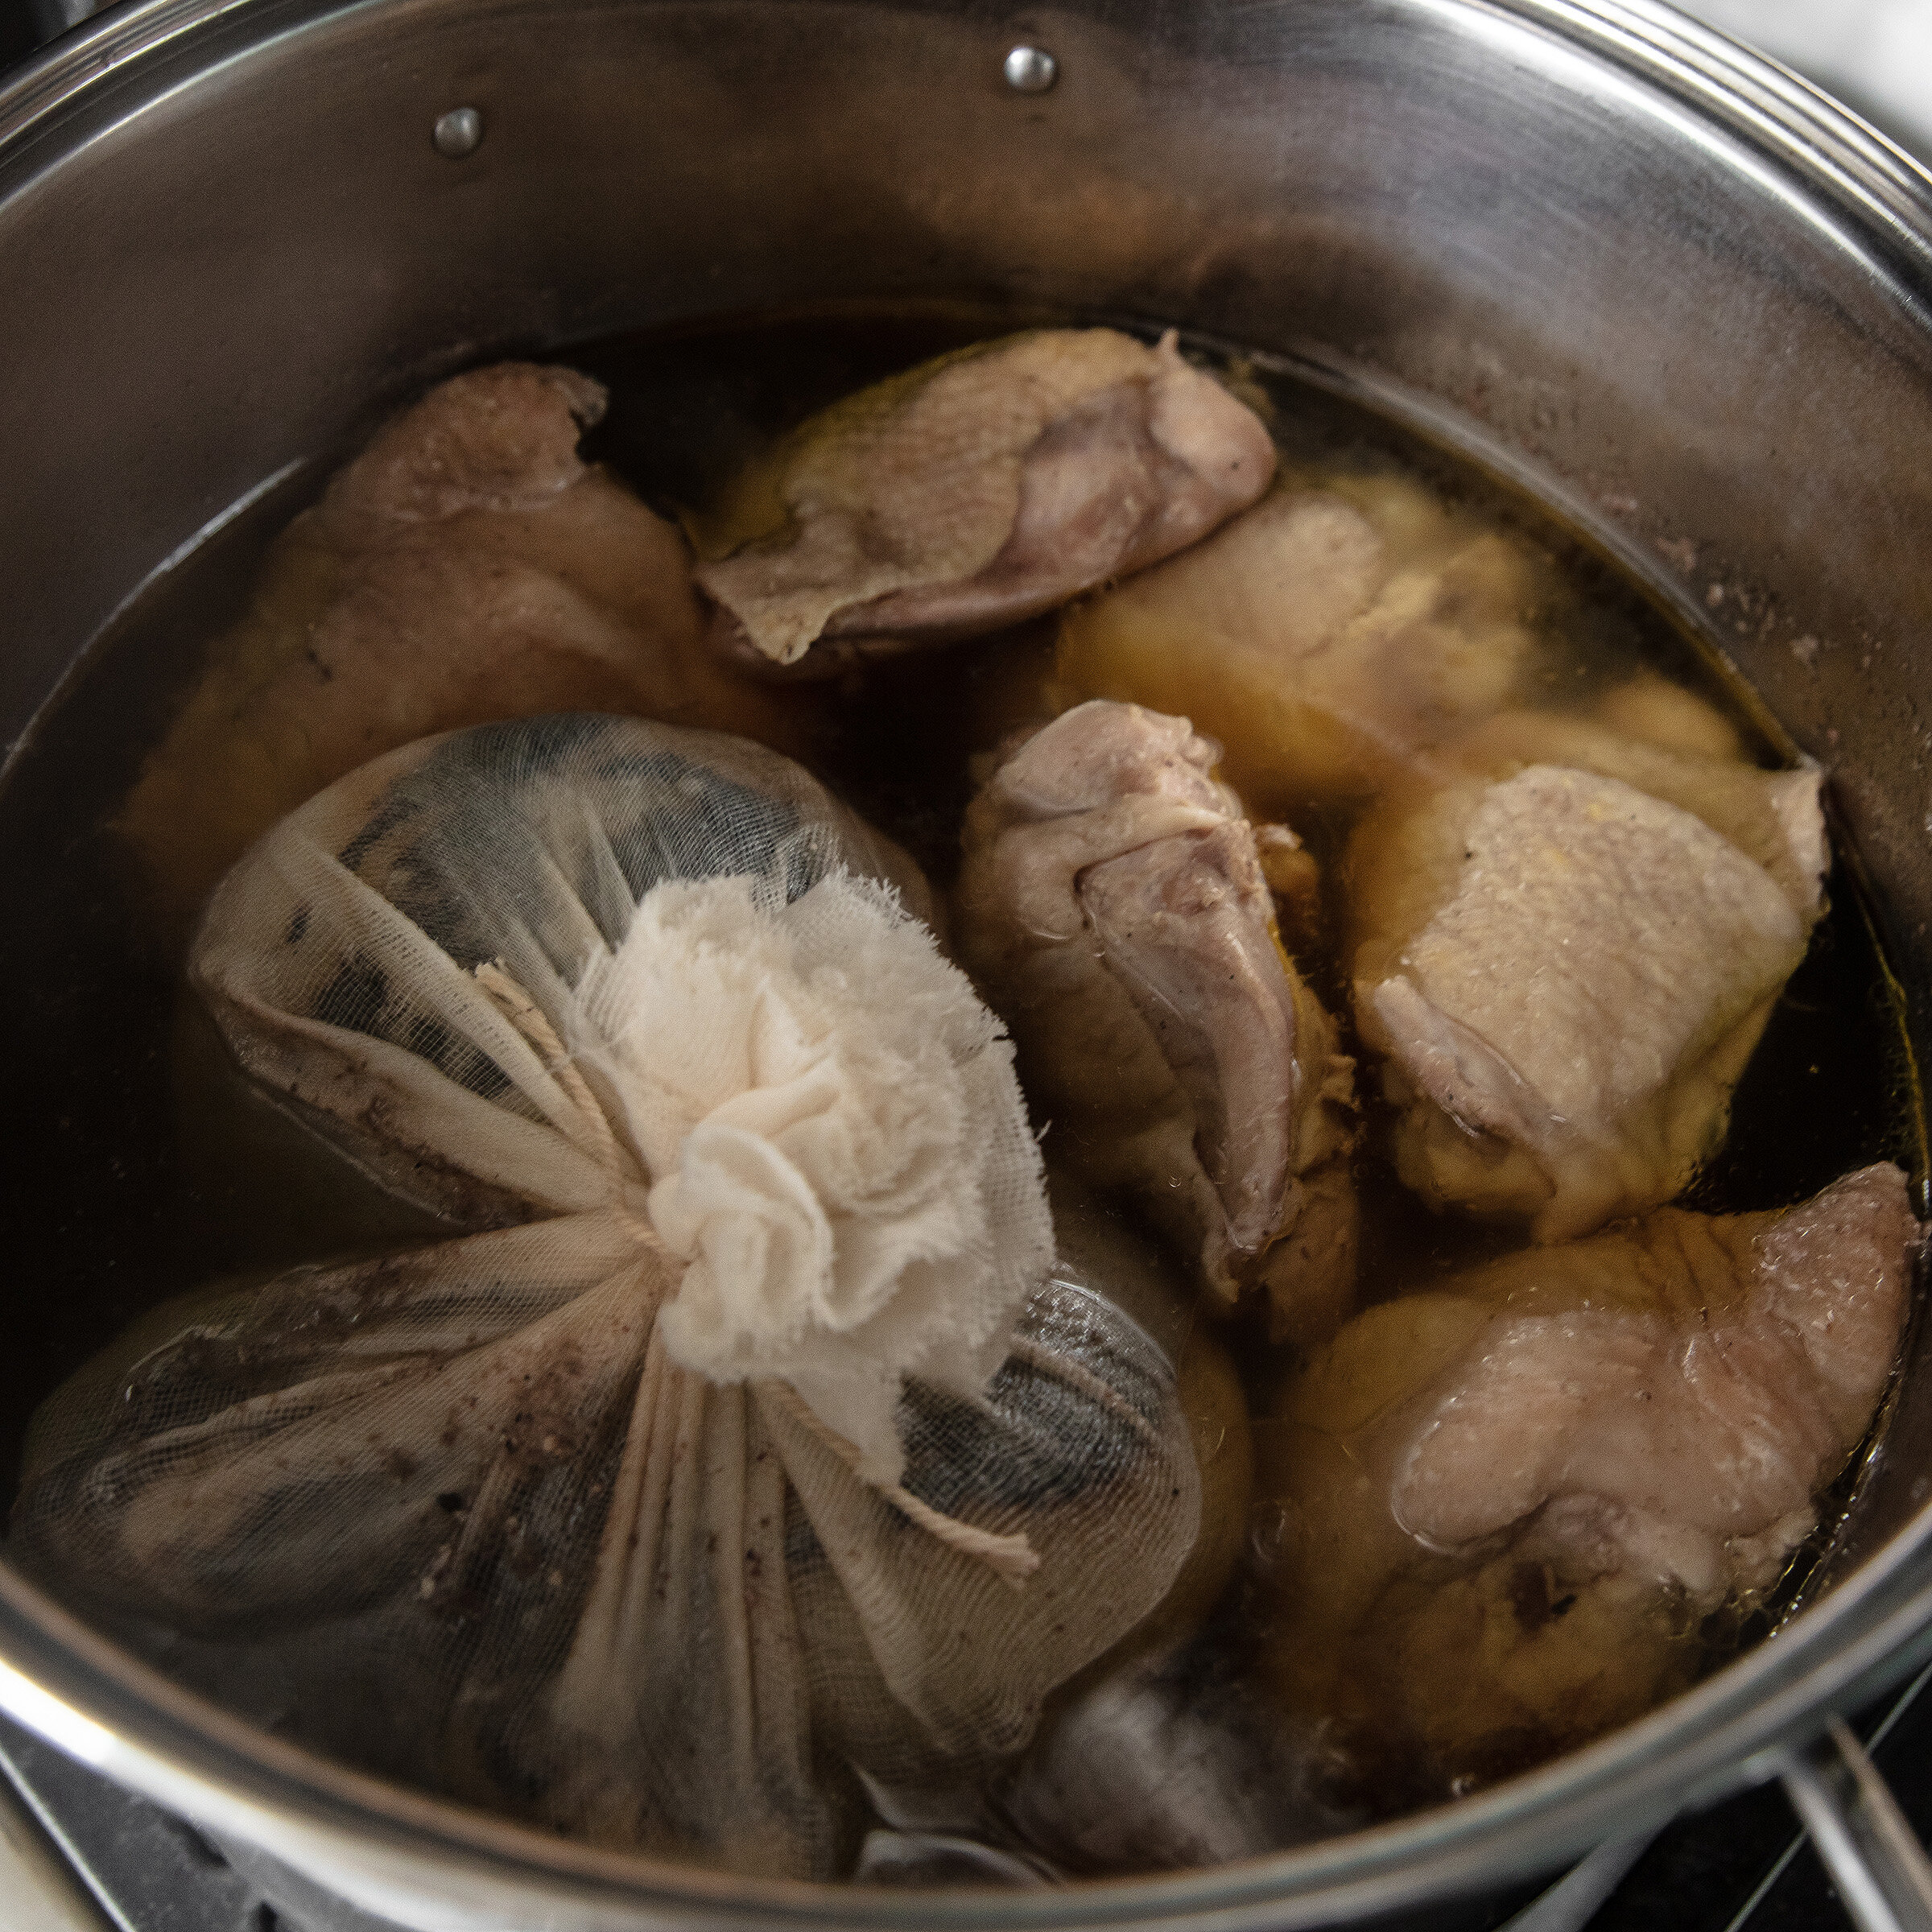
  1.  Char your onions, ginger, and the exposed part of your garlic using your gas stove or a handheld butane torch. If you are using your gas stovetop to char, I recommend using a round grill wire rack (see photo above). I use this rack all the time for charring. If you are using a handheld torch, I recommend torching over a baking rack on top of a sheet pan. You want to char until onions, ginger, and garlic are at least 60% charred, flipping over and rearranging with tongs carefully when some sides have blackened. When you are done, set them aside in a bowl to cool, and then using cheesecloth and string, tie them (make sure to include your peppercorns) into a pouch. This keeps the charred skin from floating around in the broth, and keeps the broth clean and clear, and will save you time from fishing around for ingredients later.

  2.  Begin blanching your chicken in boiling water and a 1 TBS of salt. Remove the chicken from the pot, discard the water, and set aside. 

  3.  Using a large stockpot, add 15 cups of hot water, your pouch of onions, ginger, and garlic, and peppercorn, and your chicken thighs, and bring the heat to a full boil. Then reduce the heat to a medium-low, cover, and cook for 1 hour. While the broth is cooking, skim off any crud that rises to the surface, making sure to keep at least 50% of the chicken fat (that rises to the top) in the broth (this gives it more depth and flavor).

  4.  Remove your chicken thighs and allow them to cool for about 20 minutes. Once they are cool, you can shred the chicken with your hands, removing the bones and skin, and non-meaty excess parts. Store the chicken until you’re ready to eat.

  5.  With your heat still on medium-low, stir in your short grain and sweet rice. Cook for about 20 minutes, stirring every once in a while to prevent the rice from sticking to the bottom of the pot and burning. After 20 minutes, remove from heat, allowing the residual heat to continue cooking the rice into a nice porridge like texture.

  6.  Add in 1.5 TBS chicken stock powder, 1 TBS salt, 1 TBS of fish sauce, and 3 TSP sugar. Give it a nice stir to blend all of the seasonings well.

  7.  Ladle the congee in a bowl, top with the shredded chicken, Vietnamese coriander leaves, slivered scallions, a couple grinds of pepper, and last but not least, fried shallots. Squeeze with a small wedge of lime for an extra punch of flavor. Add a dash of Maggi seasoning if desired.

Vietnamese Pineapple Anchovy Dipping Sauce ( BLENDED Mắm Nêm )
mam nem web.jpg

Growing up, my father had one mantra when it came to food: “You don’t have to like it, but you have to try it…(pauses)…and if you don’t like it, try it again.” [Insert confessional deadpan humor face, with eyes darting from side-to-side here] Did anyone else’s Vietnamese grandparents or parents taunt them to no end when you just couldn’t eat something that was exotic? I know I’m not the only one! Luckily, this mantra worked, because when it comes to food, I’ll try almost anything, and I am always impressed when others have the same mentality. Vietnamese pineapple anchovy dipping sauce, also known as mắm nêm, is one of those things that you either love, or are completely afraid of. I always say that you’re not really Vietnamese if you can’t eat mắm nêm, and if you can, guess what? You have my respect, LOL. The base of this sauce is pungent fermented anchovy, and it is blended with sweet pineapples, lime, sugar, minced lemongrass, and spicy Thai chillies. It’s absolutely delicious with grilled Vietnamese meats, and most commonly eaten with bò bảy món (7 courses of beef), a selection of beef dishes in a 7 course meal. I know that this is a hard one to eat, especially if you are not Vietnamese. And if you are, and you can’t eat it, get with the program! I know that it’s an acquired taste, and that’s why I am posting two recipes, or versions of my Vietnamese pineapple anchovy dipping sauce. The first one is the original version, and the second one is one for amateurs (those who are scared, and want to ease into it)—softer, less pungent and easier to eat, but just as delicious, I promise. Both of these recipes are my own, and I did not look online for any reference or guidance. I used my own intuition and memory of what my parents’ mắm nêm tasted like. I’m so excited to share both with you, and look forward to hearing your feedback on either one!

mam nem original web.jpg

For my original mắm nêm recipe, you’ll need a base first: a classic bottle of anchovy sauce—the thick and pungent stuff. Not for the faint of heart. The ingredients in this bottle should ONLY be anchovy fish, salt, and water—none of those fancy Saigon Pagolac brand bottles that are already pre-mixed and ready to pour (I find these way too sweet or off, and hard to convert into a homemade blended sauce). The bottle should say ‘mắm nêm', and the contents should be light brown, and thick in texture (not like a normal liquid fish sauce). I used ‘Old Man Que Huong Brand Mắm Nêm’, a product of Vietnam. I was in one of the few Vietnamese grocery stores in Manhattan, crouching down in front of the shelf of mắm nêms, and agonizing over which one to buy, when a woman behind me (who was also shopping), picked this bottle up and told me how much she loved it, highly recommending it to me. I was so touched by her sense of community, and was convinced by her passion for this brand. Seriously, she went on and on about it, LOL. I’m sure there are better brands out there, but I am working with limited resources in New York. Thankfully, it worked out perfectly. I went home and played around in the kitchen, mixing and measuring ingredients until I achieved the perfect blended mắm nêm sauce. Recipe below:

Vietnamese Pineapple Anchovy Dipping Sauce (Blended Mắm Nêm) - Original Version

Degree of difficulty: 1 (on a scale of 1-5)

Preparation time 15 min

 YOU’LL NEED

  • A food processor

  • A muddler tool, or a pestle

  • A medium sized bowl

 INGREDIENTS

  • 2 cups of pineapple chunks (preferably fresh cut at your grocery store in the pre-cut fruit section, but canned is totally fine)

  • 4 TBS sugar (you can also do a sugar alternative, like organic Stevia in the Raw, or Monkfruit sugar)

  • 1 garlic clove, peeled and smashed

  • 1 stalk of chopped lemongrass (use the tender lower 5” portion of stalk only; peeling the outer layer, and then roughly chopping)

  • 2 TBS lime juice

  • 3 Thai chilies, seeds and stem removed (feel free to add more chilies if you want more heat)

  • ¼ cup of bottled mắm nêm/thick anchovy sauce (ingredients in bottle should only be anchovy fish, salt, and water)

  • 2 TBS water

  • 2 TBS reserved pineapple juice

 DIRECTIONS

  1. In a food processor, add in 1 cup of pineapple chunks, 4 TBS sugar (or your sugar alternative), 1 garlic clove, 2 TBS of lime juice, and 3 Thai chilies (stems and seeds removed). Process until it becomes a smooth puree, and set aside.

  2. In a medium sized bowl, add in ¼ cup of bottled mắm nêm/thick anchovy sauce, the remaining 1 cup of pineapple chunks, 2 TBS of water, 2 TBS of reserved pineapple juice (you’ll find this at the bottom of the container if you purchased your chunks pre-cut at the grocery store, or the juice from your canned pineapples), and then your pureed pineapple mix.

  3. Mix all of the ingredients in the bowl well with a spoon. Then, using your muddler or your pestle, muddle the pineapple chunks until they become smaller and softer chunks, and continue until sauce melds together. 

mam nem easy web.jpg

For my easy blended mắm nêm recipe, you will also need pure anchovy fish sauce (make sure that the fish sauce you use is not made of any other seafood ingredients). I used Megachef Premium Anchovy Fish Sauce (It’s all I could find in New York, I like that it’s free of preservatives, MSG, and artificial ingredients or coloring). You can use any brand you’d like as long as its pure anchovy fish sauce, and not your standard, like Three Crabs Brand (a fish sauce I use for most of my Vietnamese dishes). Note that the difference between the anchovy base in the original and the easy to eat version is that this anchovy fish sauce is liquid rather than being a thicker consistency (as used in the original recipe). It’s not as pungent or strong, but it still packs enough of a punch to make a sauce that passes for a blended mắm nêm. It just has a gentler taste. This recipe is perfect for those who are afraid to eat the real stuff, or those who are taking baby steps towards eating the real stuff. All in all, it’s very delicious, and I highly recommend you make both and try both!

Vietnamese Pineapple Anchovy Dipping Sauce (Blended Mắm Nêm) - The Easy To Eat Version

Degree of difficulty: 1 (on a scale of 1-5)

Preparation time 15 min

 YOU’LL NEED

  • A large food processor

 INGREDIENTS

  • 1/3 cup of pure anchovy fish sauce (I used Megachef Premium anchovy fish sauce brand)

  • 2 garlic cloves, peeled and smashed

  • 2 cups of fresh pineapple chunks

  • 2 TBS fresh lime juice

  • 3.5 TBS sugar

  • 4 Thai chilies, stems and seeds removed (feel free to add more chilies if you want more heat)

 DIRECTIONS

  1. In a food processor, blend all of the above ingredients until it becomes a smooth puree.

    NOTE: The pureed pineapple tends to rise to the top, so make sure to mix well before eating.

Vietnamese Crab/Seafood Soup (Bánh Canh Cua)
banh canh web.jpg

Many times I have uttered the words, ‘this is my mom’s specialty’ for many Vietnamese dishes, but I am pretty sure that this is her number one. I have to admit that I wasn’t the biggest fan of this dish growing up (I prefer poultry, pork, or beef based Vietnamese dishes mostly), but after being away from my family/hometown, and coming back home every once in awhile, I totally get this dish, and I absolutely love it. Last week I called my mom for the recipe, and was surprised at how easy it is to make, which makes it the perfect recipe to share. For the broth base, my mom uses chicken broth, and as always, I prefer to make homemade chicken stock (I will post a simple recipe for this in the near future). I just like the flavor of my own homemade stock, but also the clarity, as I find store bought chicken broth to be on the cloudy side. I tend to make the broth the day before, and will store it in the fridge cut cut down preparation time on the day of. At home, my parents usually make this soup after eating steamed blue crabs. They save the uneaten crab meat, crab juices, and crab eggs, and they use it to make a super flavorful crab base for the soup (totally an option for you to try, and highly recommended). Unfortunately, I don’t really have access to really good blue crabs up here, so I used jars of jumbo lump crab meat in the refrigerated seafood section at my local grocery store, which make a great substitute (you can also get fresh lump crab from your local fish market). Annatto oil gives the soup a nice coloring, and directions are provided below on how to make it (it’s so easy!). I also prefer to make the annatto oil the day before (if I don’t already have it on hand), and store it in a jar. The key to this soup being so comforting (especially for a cold and/or rainy day) is its thickness from the cornstarch, but also from the chewy tapioca noodles. Make sure to place the noodles in the soup 10-15 minutes before serving (the noodles will continue to expand and soften after, so time it perfectly if you want the right texture). Freshly ground pepper, chopped scallions, chopped cilantro, and crispy fried onions bring the soup flavor up a notch, and a squeeze of lime takes you to culinary nirvana.

VIETNAMESE CRAB/SEAFOOD SOUP W/TAPIOCA NOODLES (BÁNH CANH CUA)

Degree of difficulty: 2.5 (on a scale of 1-5)

Cooking time: Approximately 50 minutes 


YOU’LL NEED

  •  A medium frying pan

  • A large stockpot


INGREDIENTS (for approx. 12 cups of chicken broth) Serves 4-6 people

  •  1 X 8oz jar/container of fresh jumbo lump crab (or if preferred, freshly peeled crab)

  • 12 cups of chicken stock (I recommend making your own chicken stock for the best flavor profile)

  •  2 TBS cooking oil

  • 5 finely chopped garlic cloves

  • 3 TBS finely chopped shallots

  • 5 TBS cornstarch powder, whisked well in 1 cup of cold water 

  • 3 TSP salt

  • 1 TSP ground white pepper

  • 4 TBS fish sauce

  • 2 TSP sugar

  • 6 TSP annatto oil

  • bánh canh noodles/thick tapioca noodles (2 X 15oz packages)

  • chopped cilantro (garnish)

  • chopped scallion (garnish)

  • crispy fried shallots (garnish)

  • sautéed shrimp and crab as a garnish (optional)

  •  lime wedges

 DIRECTIONS FOR ANNATTO OIL

  1. Heat up ½ a cup of neutral cooking oil on medium-high

  2. Stir in 2 TBS of annatto seeds

  3. Continually stir until the oil begins to color. The oil is done once the first annatto seed starts to pop. Once you hear that first pop, remove from heat, strain, and allow the oil to cool. Store in a jar (annatto oil can be used for various Vietnamese dishes/soups)


DIRECTIONS FOR CRAB/SEAFOOD SOUP/BÁNH CANH

  1. Using 2 TBS of cooking oil, sauté garlic and shallots in a frying pan on medium heat until fragrant. Once the shallots and garlic have slightly softened, increase to medium high, and add in your crab (among other seafood you would like to include, like shrimp, scallop, lobster, etc), and sauté with the garlic and shallots. If you are adding in more seafood, you may want to increase the oil and amount of garlic/shallots. Sautee for 3-5 min, and remove from the pan and set aside.

  2. Bring a large stockpot of chicken stock to a boil and then reduce the heat to medium. Add your seasoning (fish sauce, salt, sugar, ground white pepper, and annatto oil). Taste and add more salt/fish sauce/seasoning only if needed.

  3. Very slowly add the cup of cornstarch water to thicken the broth, then use a ladle to continuously stir the cornstarch into the stock.

  4. Add in your sautéed crab/seafood and garlic/shallot mix and stir well. Cook the soup for 20 min on medium heat, allowing the garlic, shallots, and crab to fully flavor the broth.

  5. After 20 minutes have passed, taste the soup and additional seasonings (salt, fish sauce) if needed. 10-15 min before serving, add in your banh canh noodles (you don’t want it to over soften, so add the noodles in just before you’re about ready to eat)

    Optional: Top with a medley of stir fried seafood (shrimp, crab/crab legs) for presentation

  6. Garnish with chopped cilantro, scallion, and crispy fried shallots. Serve with a squeeze of fresh lime and freshly ground pepper.


Vietnamese Chicken Salad ( Gỏi Gà )
goi ga web.jpg

I’ve been super busy this week prepping for the Lunar New Year, which falls on Friday, February 12th. This year we are having some friends over to celebrate the Year of the Ox. The Year of the Ox is said to bring success in business, prosperity, and wellness to all of the signs. This particular Ox year (the metal element) is also considered positive for career advancements. Since I am my mother’s daughter, I definitely believe in all these things. I am not preparing a traditional meal this year, but am making a handful of my go-to favorites, and for the first time ever, will be serving my mom’s recipe for seafood/crab bánh canh. Bánh Canh is a thick noodle soup made with delicious tapioca noodles. I will be posting the recipe for my mom’s seafood/crab bánh canh next week. Also on the menu (and this week’s featured recipe): gỏi gà, known as Vietnamese Chicken salad. This is one of my favorite Vietnamese appetizers. I love the cool crispy texture, and the crunchiness of the toppings in tandem. The combination of all of the ingredients is *chef’s kiss*. There are so many different versions of gỏi gà out there, and they’re all delicious. I prefer mine on the simpler side, with these gorgeous tones of purples (from the cabbage and red onion) and vibrant greens (from the herbs). I live for the aesthetic, what can I say? Just as important as the salad itself is the dressing to drench it in. I spent a whole afternoon perfecting my dressing, as I found the recipes that I looked at online were just standard Vietnamese dipping sauce/nước chấm recipes. I have a favorite spot in Houston that makes the most divine dressing for their chicken salads, and I’ve been chasing after a similar taste since. The dressing must have a sweet and lime-ey element that makes the salad pop in flavor. No need for extra ginger or garlic, as I feel like too many flavors can be competing and distracting. You have to get the right balance. I think I got this right! Wishing you all a very Happy Lunar New Year, filled with prosperity, good health, and love. Chúc Mừng Năm Mới!

VIETNAMESE CHICKEN SALAD ( Gỏi Gà )

Degree of difficulty: 1½ (on a scale of 1-5)

Preparation time: 30 min for salad and dressing preparation

Cooking time: 45 min - 1 hour for the chicken


YOU’LL NEED

  •  A large slicing peeler (optional) to thinly sliced the cabbage. If you don’t have one, thinly slicing with a knife is also an option.

  •  A 5.5 quart (or similar size) stockpot to poach the chicken

  • A medium mixing bowl or jar for the dressing/sauce

  •  A large mixing bowl to toss the salad and serve


INGREDIENTS (serves 4-5 people)

 FOR THE CHICKEN

  • 1 pound package of chicken thighs on the bone (4 pack)

  •  2” Piece of ginger, peeled and bruised

  • 1 small onion, peeled, with outer layer charred (charring is completely optional, but it always adds a smoky depth to the broth, and I do this with any dish that requires a broth, especiallyphở (Vietnamese noodle soup) and cháo gà (Vietnamese congee/porridge).

 FOR THE SALAD

  • 1 small green cabbage, thinly sliced

  • ¼ of a small red cabbage, thinly sliced

  • ¼ small red onion, thinly sliced

  • ½ cup fresh mint leaves

  • ½ cup rau răm (Vietnamese coriander leaves)

  • 2 Thai chilies, seeds removed, thinly sliced 

  • ½ cup fresh cilantro, roughly chopped

  • Crispy fresh fried shallots (to top finished salad with), see recipe for crispy fried shallots here.

  • Dried roasted peanuts (also to top finished salad with)

 FOR THE DRESSING

  • 5 TBS pure anchovy fish sauce

  • 3 TBS lime juice

  • 4 TBS sugar (NOTE: if you are being health conscious and using Stevia in the Raw, 1 TBS = 1.5 packets of Stevia. For 4 TBS, you will need roughly 6 packets, but I recommend adding the sugar in increments to get the right balance)

  • 1 cup hot water

  • 1-2 Thai red chilies, seeds removed, thinly sliced


DIRECTIONS

  1.  Bring 7 cups of lightly salted water to a full boil in a large stockpot (roughly 5.5 qt stockpot). Once the water is at a full boil, place your charred (charring is optional) onion, ginger, and chicken. I prefer to place the onion and ginger in some cheesecloth, and tied with string to keep things neat, and to keep the broth clear for future use. Note:  If you need to add more water to cover ingredients, then do so. Once the water comes back to a full boil, reduce the heat to medium-low heat, and allow the chicken thighs to cook for 45minutes to 1 hour, until the chicken is no longer pink.

  2.  While the chicken is poaching, make your dressing. Combine the cup of water with the fish sauce, the sugar, the chilies, and the lime juice. Mix or whisk well, and set aside. 

  3.  Once the thighs have finished poaching, take them out of the pot, allow them to cool completely, remove the skin, and then remove the meat from the bones (tearing with your hands or a shredding with a fork). Strain and save the chicken broth for future use. 

  4.  In a large bowl, combine the thinly sliced cabbage, herbs (mint, Vietnamese coriander, cilantro), sliced red onions, thinly sliced chilies, and the chicken. Add in your dressing and mix well. Serve topped with crispy fried shallots, dried roasted peanuts, and warm Vietnamese crispy rice crackers. Enjoy immediately.